
Hey there, fellow busy moms! It’s Juliette from Busy Mom Simple Nutrition, and today we’re diving headfirst into a recipe that’s become a total sanity-saver in my kitchen: Burnt Basque Cheesecake. This isn’t your average cheesecake, friends. It’s a rustic, intentionally “burnt” masterpiece that’s surprisingly simple to make and packs a serious nutrition punch.
My family adores the unique flavor and creamy texture, and I love that it’s a dessert I can feel good about serving. This Burnt Basque Cheesecake supports our family nutrition goals without requiring hours in the kitchen. Join me as we discover a new favorite that proves simple nutrition is the best nutrition. Let’s get started!
When I first tried making a Burnt Basque Cheesecake, I was intimidated by the “burnt” part. I thought, “How can something burnt taste good, let alone be nutritious?” Boy, was I wrong! I stumbled upon the Basque cheesecake recipe while searching for a dessert that wasn’t loaded with refined sugars and processed ingredients.
I wanted something that felt indulgent but still aligned with my family’s health goals. After a few attempts (and a couple of slightly too burnt cheesecakes 😂), I finally nailed it. The key is to embrace the “burnt” top, which actually adds a delicious caramelized flavor that complements the creamy interior.
The first time I served my Burnt Basque Cheesecake, my kids were skeptical. But one bite, and they were hooked! My husband, who usually prefers chocolate desserts, declared it his new favorite. The nutrition win? The Burnt Basque Cheesecake uses simple, wholesome ingredients, and you can easily tweak it to reduce the sugar content without sacrificing flavor.
It became a regular in our dinnertime rotation. My goal is to share simple nutrition solutions that don’t add to the daily overwhelm, and this recipe absolutely fits the bill. Fellow nutrition-seekers, if you’re looking for a dessert that’s easy, delicious, and surprisingly nutritious, you’ve come to the right place. Get ready to experience the magic of Burnt Basque Cheesecake!
INGREDIENTS You’ll Need:
Trust me, this Burnt Basque Cheesecake ingredient list is simple because busy moms need nutrition without complexity!
- 24 ounces cream cheese, softened: Use full-fat for the best texture and a good source of healthy fats.
- 1 1/4 cups granulated sugar: I sometimes use coconut sugar for a slightly less refined option. My family gets extra nutrition when I add a tablespoon of honey.
- 1/4 teaspoon salt: Balances the sweetness.
- 2 teaspoons vanilla extract: Adds a warm, comforting flavor.
- 5 large eggs: Provides protein and richness.
- 1 1/4 cups heavy cream: Makes it extra creamy!

You can find these wholesome ingredients at your regular grocery store. This Burnt Basque Cheesecake proves nutritious doesn’t mean expensive, just smart shopping! No worries if you don’t have vanilla extract – I use a dash of almond extract for an interesting twist in my Burnt Basque Cheesecake. Here’s a Burnt Basque Cheesecake nutrition hack that changed our family’s health: buying organic cream cheese when it’s on sale.
Let’s Make it Happen!
Alright, let’s get baking! I promise, this Burnt Basque Cheesecake recipe is easier than it looks.
- Preheat your oven to 400°F (200°C). Get that oven nice and toasty! In my busy kitchen, this nutritious Burnt Basque Cheesecake usually takes about an hour to bake.
- Line a 9-inch springform pan with parchment paper. Make sure the parchment paper extends a few inches above the rim of the pan – this helps create the signature “burnt” top. Don’t worry if it looks messy; that’s part of the charm! This Basque cheesecake recipe is a favorite for easy cleanup.
- In a large bowl, beat the softened cream cheese, sugar, and salt until smooth and creamy. I use my stand mixer, but a hand mixer works just fine too. The key is to get rid of any lumps. While your Burnt Basque Cheesecake is mixing, take a moment to appreciate nourishing your family!
- Add the vanilla extract and mix well. Next, add the eggs one at a time, mixing well after each addition. Be sure not to overmix! Overmixing can incorporate too much air into the batter, which can cause the cheesecake to crack.
- Pour in the heavy cream and mix until just combined. The batter should be smooth and pourable. Perfect time to prep tomorrow’s lunch while your Burnt Basque Cheesecake comes together!
- Pour the batter into the prepared pan. Gently tap the pan on the counter to release any air bubbles. Don’t worry if your Burnt Basque Cheesecake looks wobbly – it’s supposed to!
- Bake for 50-60 minutes, or until the top is deeply golden brown and slightly burnt. The center should still be a little wobbly. Your Burnt Basque Cheesecake should smell nourishing by now. Here’s where I used to struggle with my Burnt Basque Cheesecake – learn from my experience!
- Let the cheesecake cool completely in the pan. This is crucial for the texture. As it cools, it will continue to set. Don’t worry if your Burnt Basque Cheesecake looks cracked – it adds to the rustic appeal! This step usually takes about 2-3 hours. Time for a quick workout or a power nap!
- Once cooled, refrigerate for at least 4 hours, or preferably overnight. This allows the flavors to meld and the texture to become even creamier. Patience is key, fellow nutrition-seekers!
- Before serving, remove the cheesecake from the springform pan and gently peel away the parchment paper. Slice and enjoy this delicious, nutritious treat!
How We Love to Eat This!
My family enjoys this nutritious Burnt Basque Cheesecake in so many ways! The kids devour this nutritious Burnt Basque Cheesecake when I serve it with a side of fresh berries.
Sometimes, we’ll add a dollop of Greek yogurt for an extra boost of protein and probiotics. This Burnt Basque Cheesecake is perfect for those busy weeknights when we need good nutrition fast! It also makes a fantastic dessert for special occasions, like birthdays or holidays. If your kids love this, they’ll go crazy for pumpkin cheesecake truffles!
For a seasonal twist, try adding a sprinkle of cinnamon or nutmeg in the fall. In the summer, a drizzle of honey and a handful of fresh mint make it extra refreshing. This San Sebastian cheesecake has been a dinnertime nutrition win every time I tweak it.
Presentation-wise, I like to keep it simple. A dusting of powdered sugar or a few strategically placed berries adds a touch of elegance without being fussy. And because we always have leftovers (it’s a big cheesecake!), I love to crumble it over oatmeal or yogurt for a nutritious breakfast treat.
My guests are always impressed by this Tarta de Queso, and they’re even more surprised when I tell them how easy it is to make. They can’t believe something so delicious can also be relatively healthy! I also had a friend asking about the best basque cheesecake.
This crustless cheesecake is such a lifesaver for me, and it’s become a family favorite. The simple nutrition it offers is a game-changer in my busy mom life!
FAQs: Your Questions Answered
I get it, fellow moms. You’ve got questions! Here are some common concerns about making Burnt Basque Cheesecake.
Is this Burnt Basque Cheesecake really nutritious enough for growing kids?
Absolutely! This Burnt Basque Cheesecake is made with simple, wholesome ingredients like cream cheese, eggs, and heavy cream, all of which provide essential nutrients for growing kids. Plus, you can easily adjust the sugar content to suit your family’s needs.
What if my picky eater won’t try this healthy Burnt Basque Cheesecake?
I hear you! Picky eaters can be tough. Try serving a small slice of this easy cheesecake recipe alongside their favorite fruits or a dollop of whipped cream. Sometimes, just a little encouragement is all it takes!
Can I meal prep this Burnt Basque Cheesecake for busy weeks ahead?
Yes! This Burnt Basque Cheesecake actually tastes better after it’s been refrigerated for a day or two, so it’s perfect for meal prepping. Make it on the weekend and enjoy it throughout the week.
Can I substitute the sugar with a sugar-free alternative?
While you can try using a sugar-free alternative, keep in mind that it may affect the texture and flavor of the Burnt Basque Cheesecake. I recommend experimenting with small batches to see what works best for your family’s preferences.
What if my Burnt Basque Cheesecake doesn’t get that “burnt” top?
Don’t worry! Every oven is different. If your Burnt Basque Cheesecake isn’t getting that signature “burnt” top, try broiling it for a minute or two at the end of the baking time, but keep a close eye on it to prevent it from burning too much. For more sanity-saving dinner ideas, check out my no-bake halloween cheesecake!
Can I add other flavors to this Burnt Basque Cheesecake?
Absolutely! Feel free to get creative. Add a swirl of caramel sauce, a sprinkle of chocolate chips, or a dash of citrus zest for a unique twist. You can easily tweak it to make it your own. This Burnt Basque Cheesecake reminds me of another family favorite, Chocolate Orange Cheesecake.
How long does this Burnt Basque Cheesecake last in the refrigerator?
This Burnt Basque Cheesecake will last for up to 5 days in the refrigerator, stored in an airtight container. Though, in my house, it never lasts that long!
Final Thoughts:
This Burnt Basque Cheesecake is more than just a dessert. It’s a symbol of simple nutrition wins in our busy lives. It’s a reminder that we can nourish our families with delicious, wholesome food without spending hours in the kitchen.
This Basque cheesecake recipe supports my family’s nutrition goals because it’s lower in sugar than traditional cheesecakes, packed with protein and healthy fats, and made with simple ingredients I can feel good about.
My Burnt Basque Cheesecake Nutrition Hacks:
- Use full-fat cream cheese for a richer, more satisfying flavor and a dose of healthy fats.
- Add a tablespoon of honey for extra sweetness and nutritional benefits.
- Serve with fresh berries for added vitamins and antioxidants.
Some family-tested healthy Burnt Basque Cheesecake variations include: chocolate, pumpkin, and lemon. My son prefers the pumpkin version, while my daughter loves the lemon one. I encourage you to make this recipe your own and experiment with different flavors and ingredients. Where to find Basque Cheesecake? Some have found the answer here. Check out different ways to enjoy this crustless cheesecake.
I hope this recipe inspires you to embrace simple nutrition in your own kitchen and to find joy in nourishing your family. Fellow nutrition-seekers, I have so much love for this easy cheesecake recipe.
Remember, you’ve got this! You are capable of creating delicious, nutritious meals that your family will love, even in the midst of the nourishing chaos. Now go forth and bake a Burnt Basque Cheesecake!
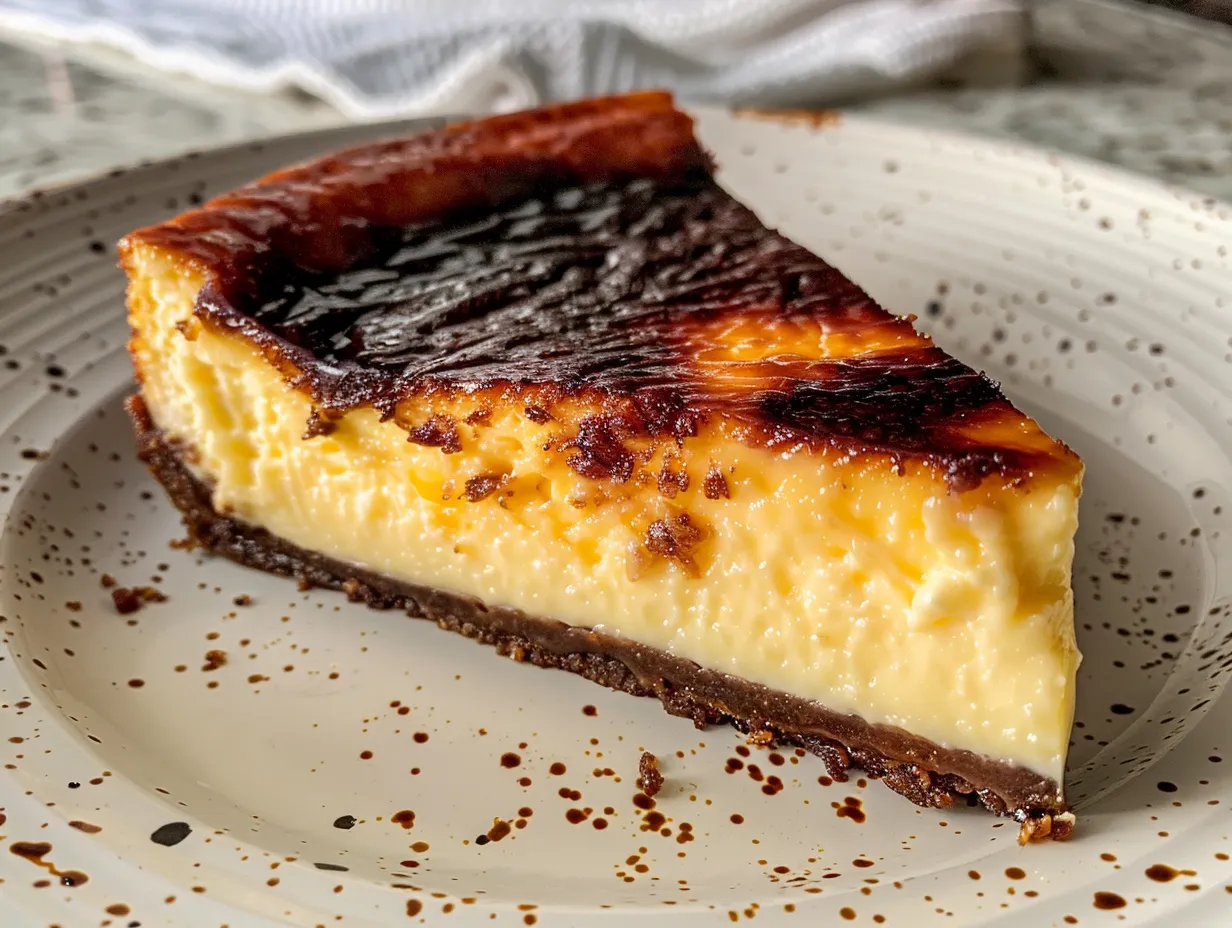
Burnt Basque Cheesecake
Indulge in the creamy, caramelized perfection of Burnt Basque Cheesecake. This crustless wonder boasts a deeply browned exterior and a delightfully soft, custard-like interior.
- Prep Time: 15 minutes
- Cook Time: 60 minutes
- Total Time: 75 minutes
- Yield: 8 servings
- Category: Dessert
- Method: Baked
- Cuisine: Spanish
Ingredients
- 900g (4 cups) cream cheese, softened
- 300g (1 ½ cups) granulated sugar
- 5 large eggs
- 480ml (2 cups) heavy cream
- 1 teaspoon vanilla extract
- 1/4 teaspoon salt
- 2 tablespoons all-purpose flour
Instructions
- Preheat oven to 400°F (200°C). Line a 9-inch springform pan with parchment paper, ensuring it extends a few inches above the rim.
- In a large bowl, beat cream cheese and sugar until smooth and creamy.
- Add eggs one at a time, mixing well after each addition.
- Stir in heavy cream, vanilla extract, and salt.
- Whisk in flour until just combined. Do not overmix.
- Pour batter into the prepared pan.
- Bake for 50-60 minutes, or until the top is deeply browned and the center is slightly jiggly.
- Let cool completely in the pan before refrigerating for at least 4 hours, or preferably overnight.
- Carefully remove from pan and parchment paper before serving.
Notes
Serve chilled or at room temperature. A dusting of powdered sugar or a drizzle of honey is optional.