
Okay, fellow nutrition-seekers! Let’s chat about something that’s been a real winner in my kitchen lately – Burnt Honey Pie. Yes, you read that right. Burnt. But trust me, it’s the good kind of burnt! This isn’t just a pie; it’s a sanity-saving nutrition hack disguised as a dessert.
I first stumbled upon the idea for a Burnt Honey Pie when I was looking for ways to sweeten things up without relying on refined sugars. I wanted something that felt like a treat but still delivered some nutritional value. The first time I made it, my kids gave me the side-eye. But after one bite? Silence. Then, requests for seconds! It was a dinnertime nutrition win.
What surprised me most about this Burnt Honey Pie was how the “burnt” honey flavor actually enhanced the sweetness and created a complex, almost smoky taste that everyone loved. Plus, honey has antioxidants and, let’s be honest, it’s a step up from processed sugars. It’s now a staple in our home.
This Burnt Honey Pie has become a favorite not just because it tastes amazing, but because it’s relatively simple to make, even on those nights when I’m juggling homework, laundry, and the never-ending quest to find matching socks. I realized this Burnt Honey Pie perfectly fit my family’s wellness goals. It’s satisfying, uses wholesome ingredients, and doesn’t leave us feeling sluggish.
So, if you’re a busy mom like me, constantly searching for ways to sneak in a little extra nutrition without sacrificing flavor or time, you’re in the right place. Let’s get into the details, and you’ll see just how easy it is to bring this nutritious and delicious Burnt Honey Pie into your own kitchen. I promise, it’s worth it!
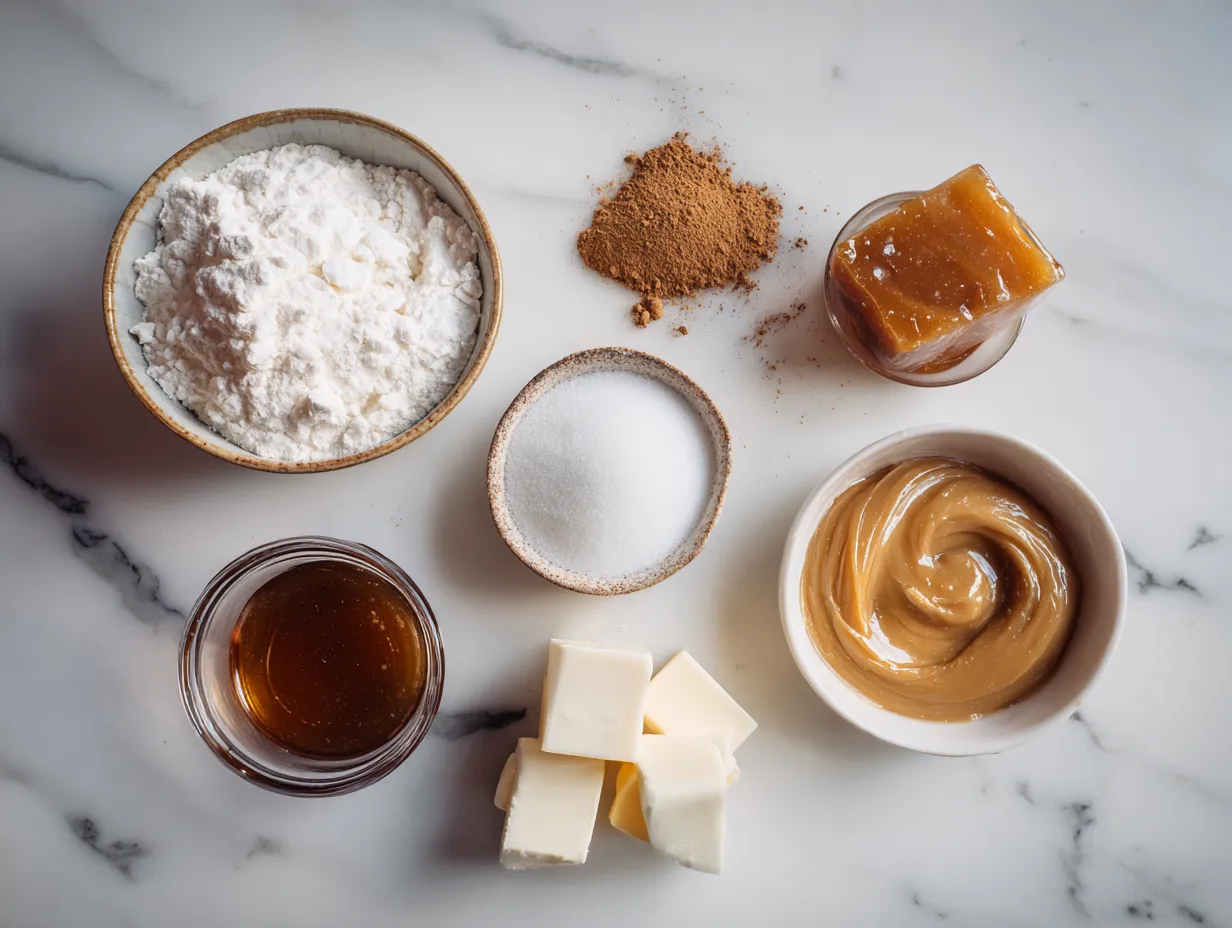
INGREDIENTS You’ll Need:
Alright, let’s gather our ingredients for this amazing Burnt Honey Pie. Trust me, this ingredient list is simple because busy moms need nutrition without complexity!
- 1 ½ cups heavy cream: This adds richness and helps create that dreamy custard texture.
- ½ cup honey: The star of the show! We’re going for a good quality honey that will caramelize beautifully.
- 4 large egg yolks: These provide the structure and richness for our custard.
- ¼ teaspoon sea salt: Just a pinch to balance the sweetness.
- 1 teaspoon vanilla extract: Adds a lovely depth of flavor.
- 1 pre-made pie crust: Look, we’re all about sanity-saving shortcuts here. A store-bought crust works perfectly!
- 1 tablespoon butter, melted: To brush on the crust for extra golden color and flavor.
- Optional: Pinch of flaky sea salt for topping after baking, Caramelized Honey Crème Brûlée | The Bake Dept reminds me how a little salt elevates sweetness!
Now, here’s a Burnt Honey Pie nutrition hack that changed our family’s health. I often swap out half the heavy cream with coconut milk for a slightly lighter, dairy-free version. You still get the creaminess, but with a little added nutrition.
You can find these wholesome ingredients at your regular grocery store. I know budget-friendly is key, so don’t feel pressured to buy the most expensive honey. This Burnt Honey Pie proves nutritious doesn’t mean expensive.
As for prep shortcuts, I like to measure out all my ingredients before I even preheat the oven. It’s a small thing, but it makes the whole process smoother when you’re juggling a million other tasks. My family gets extra nutrition when I add a tablespoon of flaxseed meal to the crust before baking. It’s virtually undetectable but adds a boost of omega-3s! This crust addition does not impact the Burnt Honey Pie flavor.
Let’s Make it Happen!
Okay, let’s get down to business and make this delicious and nutritious Burnt Honey Pie. I’m going to walk you through it step-by-step, like we’re cooking together in my kitchen.
- Preheat your oven to 350°F (175°C). Place your pie crust in a pie dish. Brush the crust with melted butter and bake for 10 minutes to pre-bake it slightly. This helps prevent a soggy bottom.
- While the crust is baking, let’s make the honey custard. In a medium saucepan, combine the heavy cream and honey. Heat over medium heat, stirring occasionally, until the mixture comes to a simmer. Be careful not to boil! We want that honey to start to caramelize and develop that “burnt” flavor, but not actually burn. I like to make sure the Burnt Honey Pie is going to come out perfect every time.
- Remove the saucepan from the heat. In a separate bowl, whisk together the egg yolks and salt. Slowly drizzle a small amount of the hot cream mixture into the egg yolks, whisking constantly to temper the eggs. This prevents them from scrambling when you add them to the hot mixture.
- Pour the egg yolk mixture back into the saucepan with the remaining cream and honey. Cook over low heat, stirring constantly, until the custard thickens slightly and coats the back of a spoon. This usually takes about 5-7 minutes. Don’t let it boil! Your Burnt Honey Pie should smell nourishing by now.
- Remove from heat and stir in the vanilla extract. Pour the custard into the pre-baked pie crust.
- Bake for 30-35 minutes, or until the filling is set around the edges but still slightly wobbly in the center. Don’t worry if your Burnt Honey Pie looks a little jiggly – it will continue to set as it cools.
- Let the pie cool completely on a wire rack. This is crucial! The custard needs time to set properly. Once cooled, refrigerate for at least 2 hours before serving. I know waiting is the hardest part!
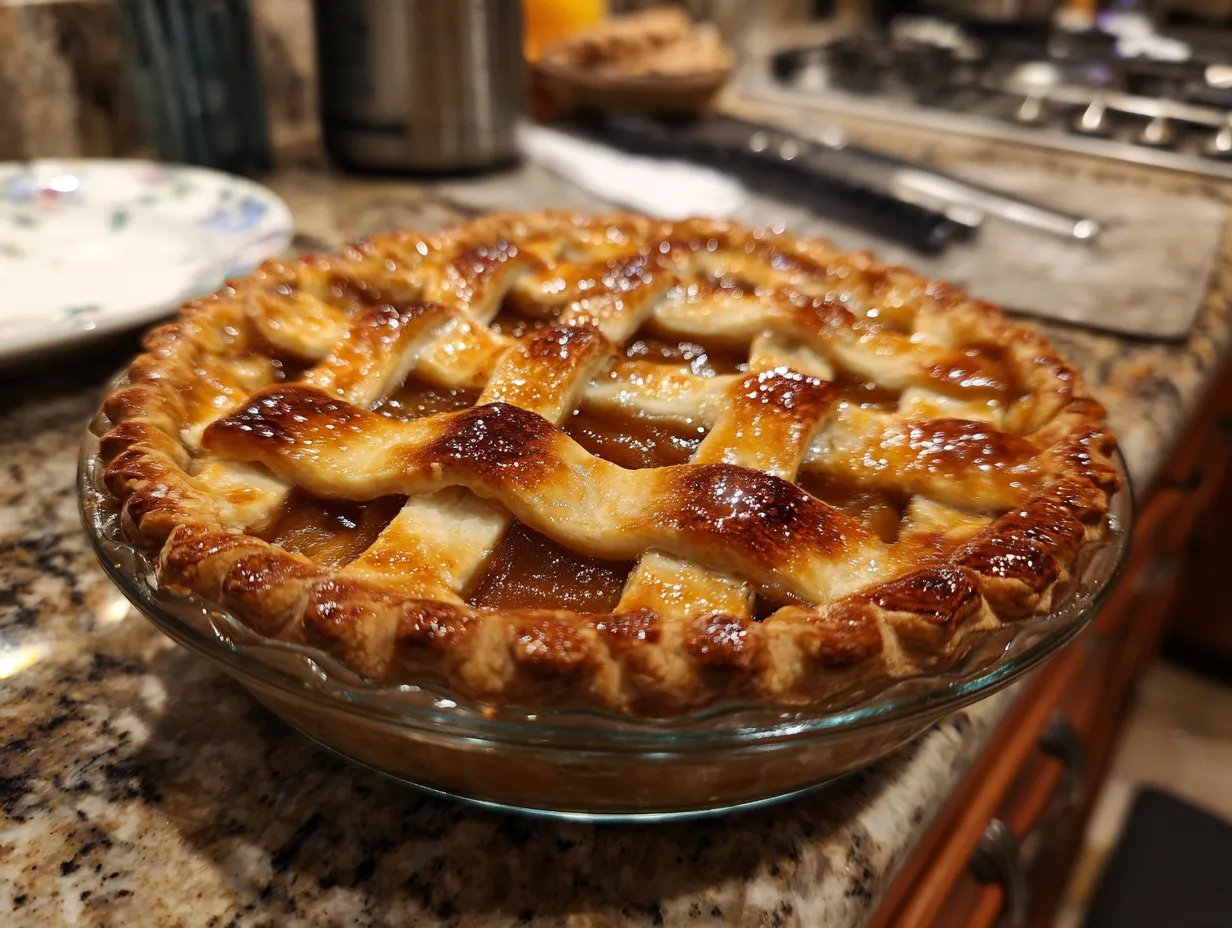
- Before serving, you can optionally brulee the top of the pie for an extra touch of caramelized goodness. Sprinkle a thin layer of sugar over the top and use a kitchen torch to caramelize the sugar until golden brown. Be careful not to burn the crust! If you are interested in a burnt basque cheesecake for another dessert option, visit: Burnt Basque Cheesecake
- Garnish with a sprinkle of flaky sea salt, if desired, and enjoy your Burnt Honey Pie!
Here’s where I used to struggle with my Burnt Honey Pie – I would get impatient and not let it cool completely. Trust me, it makes a huge difference in texture! Also, in my busy kitchen, this nutritious Burnt Honey Pie usually takes about an hour and a half from start to finish, including baking and cooling time. Perfect time to prep tomorrow’s lunch!
While your Burnt Honey Pie is cooking, take a moment to appreciate nourishing your family! Cooking is an act of love, and you’re doing a great job, mama!
How We Love to Eat This!
Okay, so now that you’ve baked this incredible Burnt Honey Pie, let’s talk about how we love to enjoy it in my house. I am happy to share a Burnt Honey Pie with friends. The feedback is always very positive.
The kids devour this nutritious Burnt Honey Pie when I serve it with a dollop of Greek yogurt and some fresh berries. The yogurt adds a boost of protein and the berries provide antioxidants and fiber. It’s a balanced dessert that I feel good about giving them. My kids enjoy this Burnt Honey Dessert.
This Burnt Honey Pie is perfect for those busy weeknights when we need good nutrition fast! I often bake it on a Sunday afternoon so we can have a delicious and relatively healthy dessert throughout the week. Plus, it makes the house smell amazing!
For presentation, I like to dust the top with a little cocoa powder or a sprinkle of cinnamon. It adds a touch of elegance and makes the pie look even more appealing. I also love to cut it into small slices so everyone can savor each bite.
As for leftovers (if there are any!), I store them in an airtight container in the refrigerator. They’re just as delicious the next day! Sometimes, I even crumble the leftover pie over granola and yogurt for a quick and easy breakfast.
In the fall, I like to add a pinch of cinnamon and nutmeg to the custard for a warmer, more seasonal flavor. In the summer, I’ll top it with fresh peaches or nectarines. The possibilities are endless! You can experiment with all sorts of variations of this Burnt Honey Pie. If you like peaches, you might also be interested in this Honey BBQ Chicken Mac and Cheese Recipe
Honestly, this Burnt Honey Pie has been a game-changer in our house. It’s a treat that we can all enjoy without feeling guilty, and it’s a reminder that nutritious food can be incredibly delicious.
FAQs: Your Questions Answered
I know you probably have some questions about this Burnt Honey Pie, so let’s tackle them head-on. I’m here to help you feel confident and successful in the kitchen!
Is this Burnt Honey Pie really nutritious enough for growing kids?
Yes! While it is still a dessert, it uses honey as a natural sweetener, which has antioxidants and a lower glycemic index than refined sugar. Plus, the eggs provide protein and the dairy (or coconut milk) adds calcium. I focus on making sure every ingredient contributes something positive to their nutrition.
What if my picky eater won’t try this healthy Burnt Honey Pie?
Ah, the picky eater challenge! I get it. My strategy is to start small. Offer a tiny sliver alongside something they already love. Don’t force it. Sometimes, just seeing you enjoy it is enough to pique their interest. Also, you can involve them in the baking process. Kids are often more willing to try things they’ve helped create.
Can I meal prep this Burnt Honey Pie for busy weeks ahead?
Absolutely! This pie is perfect for meal prep. Bake it on the weekend and enjoy it throughout the week. It actually tastes better after it’s had a chance to chill in the refrigerator for a day or two. Just make sure to store it properly in an airtight container.
Can I make this Burnt Honey Pie vegan?
It’s tricky, but possible. You’d need to find a vegan pie crust, use coconut milk instead of heavy cream, and replace the eggs with a vegan egg substitute. The honey is the real challenge, as it’s an animal product. You could try substituting it with maple syrup, but it will change the flavor profile.
What if I burn the honey while making the custard?
A little bit of “burnt” flavor is what we’re going for, but if you accidentally burn it to the point where it tastes bitter, you’ll need to start over. Keep a close eye on the honey and cream mixture and remove it from the heat as soon as it starts to caramelize.
Can I use a different type of honey?
Yes! Experiment with different varieties of honey to find your favorite flavor. Clover honey is mild and sweet, while buckwheat honey has a stronger, more robust flavor. Each will lend a unique nuance to the Burnt Honey Pie.
How long does this Burnt Honey Pie last in the refrigerator?
It will last for up to 3-4 days in the refrigerator, stored in an airtight container. But trust me, it probably won’t last that long!
I hope these answers help! Remember, cooking should be fun and stress-free. Don’t be afraid to experiment and make this Burnt Honey Pie your own.
Final Thoughts:
This Burnt Honey Pie is more than just a dessert; it’s a symbol of how we can find simple, nourishing solutions for our families, even in the midst of our busy lives. It supports our family’s nutrition goals by providing a treat that’s made with wholesome ingredients and doesn’t leave us feeling guilty or sluggish.
My Burnt Honey Pie Nutrition Hacks:
- Add flaxseed meal to the crust for a boost of omega-3s.
- Swap half the heavy cream with coconut milk for a lighter, dairy-free version.
- Top with Greek yogurt and fresh berries for added protein, fiber and antioxidants.
Here are a few family-tested healthy Burnt Honey Pie variations:
- Spiced Burnt Honey Pie: Add a pinch of cinnamon, nutmeg, and ginger to the custard for a warm, cozy flavor.
- Citrus Burnt Honey Pie: Add a tablespoon of lemon or orange zest to the custard for a bright, refreshing twist.
- Chocolate Burnt Honey Pie: Add a tablespoon of cocoa powder to the custard for a decadent chocolate flavor.
For another flavor option, checkout this Brulee Bourbon Sweet Potato Pie Recipe | Sweet Tea + Thyme
My son loves the chocolate version, while my daughter prefers the citrus one. I personally love the spiced version in the fall.
I encourage you to make this Burnt Honey Pie your own. Don’t be afraid to experiment with different flavors and ingredients to find what your family loves. After all, the best nutrition is the kind that everyone enjoys! To compare to other methods, here is a way to approach the Double-Caramel Flan Recipe – Desserts
I truly hope this recipe brings you and your family as much joy and nourishment as it has brought mine. Remember, you’re doing an amazing job, mama! Keep striving for simple nutrition wins, and don’t be afraid to embrace the nourishing chaos of family life. You’ve got this!
Now, go bake that Burnt Honey Pie and share the love (and the nutrition!) with your family. You’ll be so happy you did!
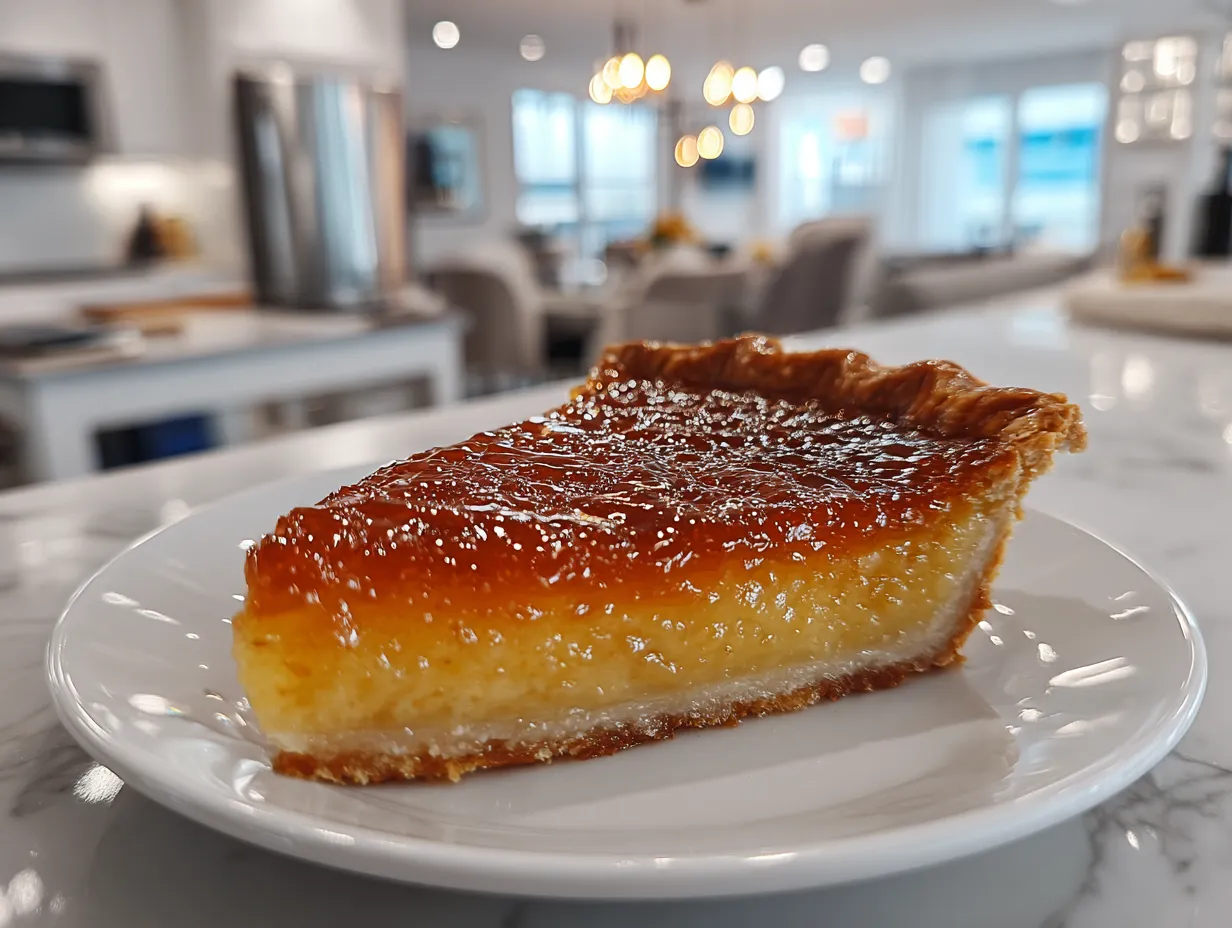
Burnt Honey Pie
This Burnt Honey Pie boasts a deeply caramelized honey flavor nestled in a flaky crust. It’s a sophisticated dessert that’s surprisingly easy to make and sure to impress.
- Prep Time: 20 minutes
- Cook Time: 45 minutes
- Total Time: 65 minutes
- Yield: 8 servings
- Category: Dessert
- Method: Baked
- Cuisine: American
Ingredients
- 1 1/4 cups all-purpose flour
- 1/2 teaspoon salt
- 1/2 cup (1 stick) cold unsalted butter, cubed
- 1/4 cup ice water
- 1 cup heavy cream
- 1/2 cup honey
- 1/4 cup granulated sugar
- 2 large eggs
- 1/4 teaspoon salt
- 1 teaspoon vanilla extract
Instructions
- Prepare the pie crust: In a large bowl, whisk together flour and salt. Cut in cold butter using a pastry blender or your fingers until the mixture resembles coarse crumbs.
- Gradually add ice water, mixing until the dough just comes together. Form into a disc, wrap in plastic wrap, and chill for at least 30 minutes.
- Preheat oven to 375°F (190°C). On a lightly floured surface, roll out the dough into a 12-inch circle. Transfer to a 9-inch pie plate. Crimp the edges.
- Bake the crust for 15 minutes, or until lightly golden. Remove from oven.
- Make the filling: In a saucepan, heat heavy cream, honey, and sugar over medium heat. Bring to a simmer, stirring constantly, until the mixture turns a deep amber color, about 8-10 minutes. Watch carefully to prevent burning.
- Remove from heat and let cool slightly. In a separate bowl, whisk together eggs, salt, and vanilla extract. Slowly whisk the warm honey mixture into the egg mixture.
- Pour the filling into the pre-baked pie crust. Bake for 30-35 minutes, or until the filling is set but still slightly jiggly in the center.
- Let cool completely before serving.
Notes
Serve with a dollop of whipped cream or a scoop of vanilla ice cream for an extra decadent treat.