Feeding my family well used to feel like a never-ending circus. Balancing school, work, and somehow sneaking in veggies felt impossible!
Then I remembered the Cheese Ball!
It may sound old-school, but hear me out, fellow nutrition-seekers: a Cheese Ball is a blank canvas for sneaky nutrition wins. It’s a fun way to get the kids excited about healthy snacking. It all started one crazy Christmas Eve…
It was Christmas Eve, and I was frazzled. The family was coming over, I forgot to plan an appetizer, and I was running out of time! Scrambling through my fridge, I spotted some cream cheese, cheddar, and leftover cranberries. A Cheese Ball was born! I pulsed everything in my food processor, rolled it in pecans (the kids loved this part!), and stuck it in the fridge. To my surprise, everyone devoured it! Even my pickiest eater asked for seconds. I realized I stumbled upon a dinnertime nutrition win! That first Cheese Ball wasn’t perfect, but it taught me something: simple ingredients, prepared with love, can be powerfully nourishing.
Since then, the Cheese Ball has become my secret weapon! It’s a sanity-saving nutrition option.
The best part? The humble Cheese Ball is a vehicle for so much nutrition, and it’s incredibly adaptable. Perfect for the holidays, game night, or just a fun after-school snack, and it is super simple to make your own easy Cheese Ball recipe. You can even get the kids involved!
Join me, fellow busy moms, as we explore the wonderful world of the Cheese Ball and discover how it can bring simple nutrition and joy to our families, one delicious bite at a time.
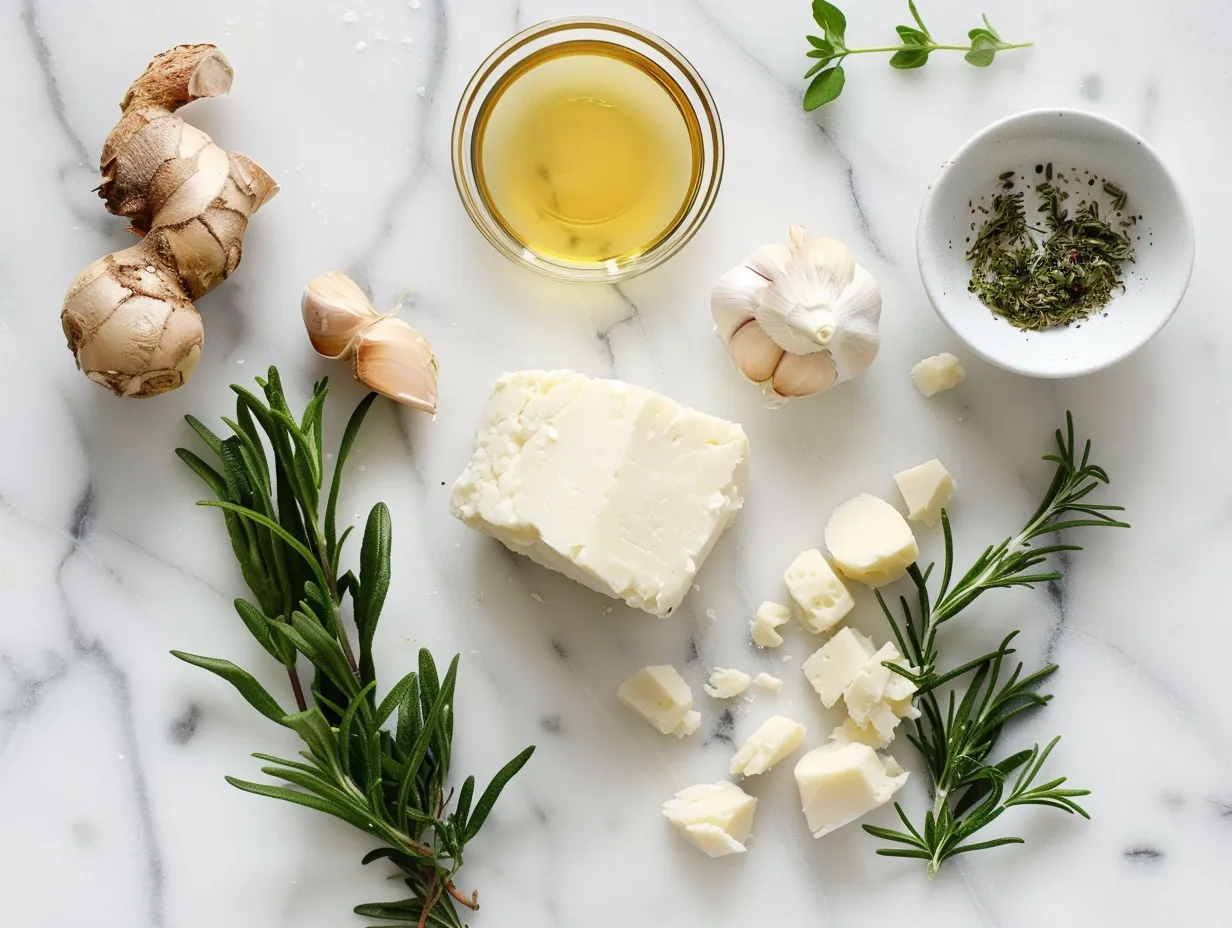
INGREDIENTS You’ll Need:
Here’s what you need to whip up this nutritious and delicious Cheese Ball recipe. Don’t worry if you’re missing something—I always have a trick or two up my sleeve for sneaky nutrition additions! Trust me, this Cheese Ball ingredient list is simple because busy moms need nutrition without complexity! This Cheese Ball proves nutritious doesn’t mean expensive.
- 8 oz Cream Cheese, softened: This is the creamy base! If you are looking for a lighter option, Neufchâtel cheese works great, too.
- 1 cup Cheddar Cheese, shredded: Adds that classic cheesy flavor. For a nutrition boost, try a sharp cheddar – it means you can use less and still get great flavor.
- 1/2 cup crumbled Feta Cheese: This adds a tangy zest that makes your tastebuds sing! Plus, Feta is packed with calcium.
- 1/4 cup Dried Cranberries, chopped: These little gems add sweetness and a pop of color, plus antioxidants!
- 1/4 cup Walnuts, chopped: These add a wonderful crunch and are full of healthy fats. Feel free to swap with pecans or almonds.
- 2 tablespoons Green Onions, chopped: For a fresh, mild onion flavor.
- 1 teaspoon Garlic Powder: Because everything is better with garlic!
- 1/4 teaspoon Black Pepper: To balance the sweetness.
- Optional Coating: Chopped pecans, parsley, everything bagel seasoning.
You can find these wholesome ingredients at your regular grocery store. I always stock up on cream cheese and cheddar when they’re on sale. Here’s a Cheese Ball nutrition hack that changed our family’s health. I keep the ingredients in stock, so I can whip up a batch for a quick and healthy snack or appetizer anytime! I even sometimes sneak in some finely chopped spinach or kale for extra nutrition, and the kids never notice! My family gets extra nutrition when I add a tablespoon of flaxseed meal to the mix. It adds a nutty flavor and a boost of omega-3s!
Let’s Make it Happen!
Let’s get our hands cheesy! Here’s how to make this simple, tasty Cheese Ball! Remember, this isn’t about perfection, it’s about creating a nourishing treat for your family.
- Combine the Cheeses: In a medium bowl, beat together the softened cream cheese, cheddar cheese, and feta cheese until well combined. I use a hand mixer to make it extra smooth, but a spoon works just fine, too!
- Add the Goodies: Stir in the dried cranberries, walnuts, green onions, garlic powder, and black pepper. Make sure everything is evenly distributed.
- Chill Out: Cover the bowl with plastic wrap and refrigerate for at least 30 minutes. This helps the Cheese Ball firm up and makes it easier to roll. In my busy kitchen, this nutritious Cheese Ball usually takes about 15 minutes to prep, then chills while I prep dinner.
- Shape the Ball: Remove the Cheese Ball mixture from the refrigerator. On a piece of parchment paper or plastic wrap, shape the mixture into a ball. Don’t worry if your Cheese Ball looks a little lumpy, it’ll still taste amazing!
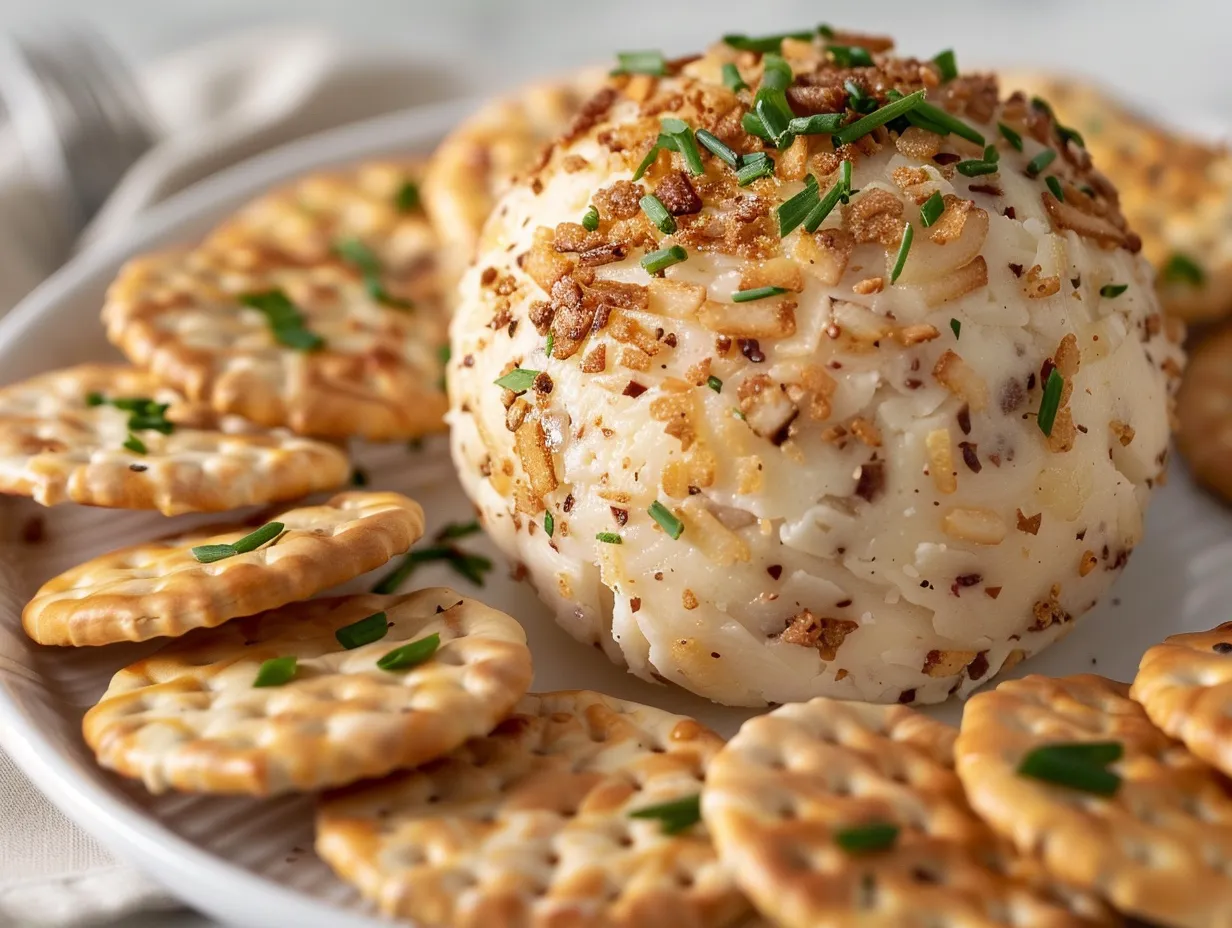
- Coat It: In a shallow dish, place your coating of choice (chopped pecans, parsley, everything bagel seasoning, etc.). Roll the Cheese Ball in the coating, pressing gently to help it adhere.
- Chill Again: Wrap the coated Cheese Ball in plastic wrap and refrigerate for at least another 30 minutes to allow the coating to set. While your Cheese Ball is chilling, take a moment to appreciate nourishing your family! Perfect time to prep tomorrow’s lunch!
- Serve and Enjoy: Remove the Cheese Ball from the refrigerator about 15 minutes before serving. Serve with crackers, veggies, or your favorite dippers. Here’s where I used to struggle with my Cheese Ball – I often didn’t chill it long enough! Learn from my experience – patience is key. Your Cheese Ball should smell nourishing by now.
See how easy that was? In my busy kitchen, this nutritious Cheese Ball usually takes about 15 minutes to prep, then chills while I prep dinner. I usually let the kids help with coating the ball. They think it’s so fun!
How We Love to Eat This!
This Cheese Ball is a family favorite for so many reasons! It is perfect for those busy weeknights when we need good nutrition fast!
We love to serve this nutritious Cheese Ball with a variety of dippers:
- Crackers: Whole-grain crackers provide fiber.
- Veggies: Carrot sticks, celery, cucumber slices, and bell pepper strips add crunch and vitamins.
- Apple slices: The sweetness of the apples pairs perfectly with the savory Cheese Ball.
- Pretzels: For a salty, crunchy contrast.
The kids devour this nutritious Cheese Ball when I serve it with sliced apples. I always make sure to have a variety of dippers on hand. I’ve even used it as a spread on sandwiches. The perfect time to enjoy this is during the holidays. It also makes a great appetizer for game night or potlucks.
For a festive touch, try shaping the Cheese Ball into a Christmas tree or snowman. This Cheese Ball reminds me of another family-healthy favorite, Pumpkin Cheesecake Truffles.
If you have any leftover Cheese Ball, crumble it over a salad for a boost of flavor and protein. It’s also delicious spread on a bagel or used as a filling for stuffed peppers.
My kids even enjoy it on a toasted bagel! This nutritious Cheese Ball always brings a smile to our faces!
FAQs: Your Questions Answered
Here are some common questions I get about making this simple and nutritious Cheese Ball recipe. Don’t worry, I’ve been there too!
1. Is this Cheese Ball really nutritious enough for growing kids?
Absolutely! The cream cheese provides protein and calcium. The added nuts and seeds offer healthy fats and fiber. Plus, you can customize it with even more nutritious ingredients like veggies and herbs. I sneak in finely chopped spinach, and my kids never notice!
2. What if my picky eater won’t try this healthy Cheese Ball?
I get it! Picky eaters are a challenge. Try involving them in the process of making the Cheese Ball. Let them choose the coating or help with mixing. Serve it with their favorite dippers. You can also start with a small amount and gradually increase it as they get used to the taste. Presentation is key! Arrange the dippers nicely around the Cheese Ball to make it more appealing.
3. Can I meal prep this Cheese Ball for busy weeks ahead?
Yes! This Cheese Ball is perfect for meal prepping. You can make it ahead of time and store it in the refrigerator for up to a week. Just make sure to wrap it tightly in plastic wrap to prevent it from drying out. I often make a batch on Sunday and have it ready for snacks or appetizers throughout the week.
4. Can I make this Cheese Ball dairy-free or vegan?
Yes! Use a dairy-free cream cheese alternative and a vegan cheddar cheese. You can also add nutritional yeast for a cheesy flavor.
5. What are some other nutritious additions I can add to this Cheese Ball?
The possibilities are endless! Try adding:
- Chopped sun-dried tomatoes
- Olives
- Roasted red peppers
- Fresh herbs like dill or parsley
- Everything bagel seasoning
6. How can I make this Cheese Ball more festive for the holidays?
Shape it into a Christmas tree or snowman using cookie cutters. Decorate it with colorful veggies and herbs. Serve it with festive crackers or pretzels. Check out Christmas Cheese Ball Recipe – Julias Simply Southern for more festive ideas! Or Best Holiday Cheese Ball – Marie Bostwick.
7. Can I freeze this Cheese Ball?
I don’t recommend freezing the Cheese Ball, as it can change the texture of the cream cheese. It’s best to make it fresh and store it in the refrigerator.
Final Thoughts:
This Cheese Ball is more than just an appetizer. It’s a sanity-saving nutrition tool! It’s a way to bring simple nutrition and joy to our families. Remember, it’s about progress, not perfection.
Here are my Cheese Ball Nutrition Hacks:
- Sneak in veggies: Finely chop spinach, kale, or carrots and add them to the mixture.
- Use whole-grain crackers: They provide fiber and keep you feeling full longer.
- Add healthy fats: Nuts and seeds add a boost of omega-3s and healthy fats.
Here are a few family-tested, healthy Cheese Ball variations:
- Spicy Jalapeño Cheese Ball: Add diced jalapeños and a dash of hot sauce for a kick.
- Mediterranean Cheese Ball: Add sun-dried tomatoes, olives, and feta cheese.
- Everything Bagel Cheese Ball: Coat the Cheese Ball in everything bagel seasoning.
My son loves the spicy jalapeño version, while my daughter prefers the classic with cranberries and pecans. I find inspiration from places such as Christmas Cheese Ball Recipe. For more simple nutrition ideas for busy families, check out these great resources on https://busymomsimplenutrition.com/pumpkin-cheesecake-truffles and https://busymomsimplenutrition.com/no-bake-halloween-cheesecake.
I encourage you to make this Cheese Ball your own! Experiment with different ingredients and flavors to find what your family loves best. My family enjoys Cheese Ball and Mac and Cheese soup. I hope this recipe helps you bring simple nutrition to your family. You’ve got this, fellow busy mom! Enjoy this nourishing Cheese Ball!
Cheese Ball
This classic cheese ball is the perfect appetizer for any party! Creamy and flavorful, it’s easy to make and always a crowd-pleaser.
- Prep Time: 15 minutes
- Cook Time: 0 minutes
- Total Time: 135 minutes
- Yield: 10 servings
- Category: Appetizer
- Method: No-Cook
- Cuisine: American
Ingredients
- 8 ounces cream cheese, softened
- 4 ounces sharp cheddar cheese, shredded
- 4 ounces Monterey Jack cheese, shredded
- 1/2 cup pecans, chopped
- 1/4 cup green onions, chopped
- 1 teaspoon Worcestershire sauce
- 1/2 teaspoon garlic powder
- Salt and pepper to taste
- Crackers or vegetables, for serving
Instructions
- In a large bowl, combine the softened cream cheese, cheddar cheese, Monterey Jack cheese, green onions, Worcestershire sauce, garlic powder, salt, and pepper. Mix well until everything is evenly distributed.
- Shape the mixture into a ball.
- Place the chopped pecans in a shallow dish. Roll the cheese ball in the pecans, pressing gently to make them adhere.
- Wrap the cheese ball in plastic wrap and refrigerate for at least 2 hours, or overnight, to allow the flavors to meld.
- Serve with crackers or vegetables.
Notes
For a spicier kick, add a pinch of cayenne pepper to the cheese mixture. You can also use different types of nuts or coat the cheese ball in dried cranberries for a festive touch.