The Classic Cheese Ball Recipe: A Busy Mom’s Sanity Saver
Okay, here we go! I’m ready to channel my inner Juliette and share some sanity-saving nutrition with fellow busy moms! Let’s dive into this classic cheese ball recipe – a dinnertime nutrition win in my book!
The holidays always bring back memories of my Grandma’s kitchen, filled with laughter, warmth, and of course, her famous classic cheese ball recipe. I remember being fascinated by how she transformed simple ingredients into this delightful appetizer that everyone devoured. It was more than food; it was a symbol of togetherness and joy. As I got older, I wanted to recreate that magic for my own family. I wanted something that would be easy to put together, kid friendly and have that flavor that kept people coming back for more. That’s when I set out to create this classic cheese ball recipe that is perfect for parties, holidays or even just a snack!
But here’s the thing – my Grandma’s version, while delicious, wasn’t exactly a nutrition powerhouse. So, I tweaked it! I found sneaky ways to boost the nutrients without sacrificing the flavor that made it so beloved. It became my mission to create a classic cheese ball recipe that was both nostalgic and nourishing, perfect for my family’s needs.
And you know what? It worked! This classic cheese ball recipe quickly became a family favorite. Not only does it bring back fond memories, but I also love knowing that I’m feeding my family something they enjoy AND that’s good for them. It’s one of those sanity-saving nutrition wins that I love to share with other busy moms!
So, if you’re a fellow nutrition-seeker looking for simple ways to feed your family well without spending hours in the kitchen, you’re in the right place! Let’s get started on this classic cheese ball recipe together!
INGREDIENTS You’ll Need:
Trust me, this classic cheese ball recipe ingredient list is simple because busy moms need nutrition without complexity!
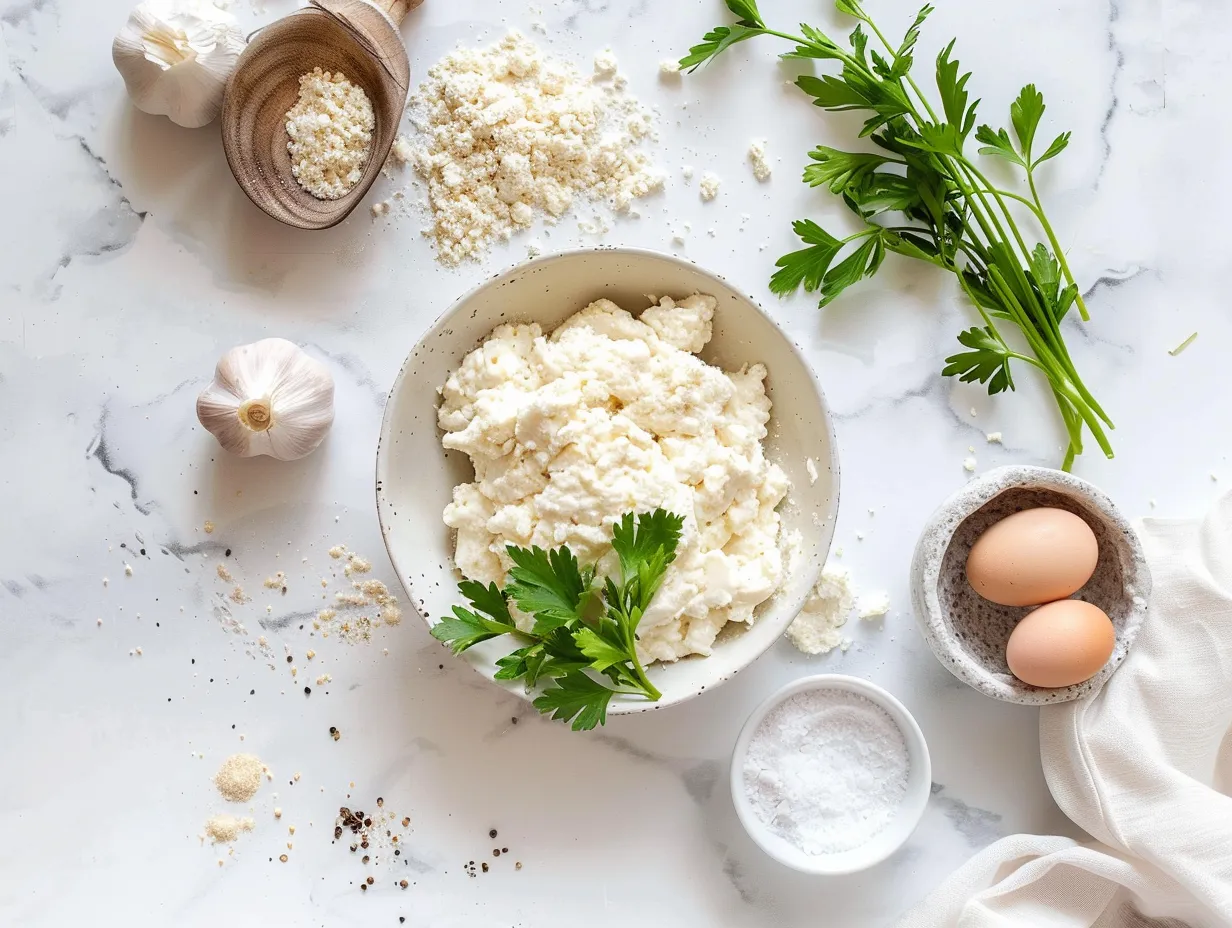
- 8 ounces cream cheese, softened (Full-fat or reduced-fat both work great. You can even use a plant-based cream cheese for a dairy-free classic cheese ball recipe!)
- 1 cup shredded cheddar cheese (I prefer sharp cheddar for a bolder flavor, but mild works too. For extra nutrition, I sometimes mix in a little shredded Parmesan.)
- ½ cup finely chopped pecans or walnuts (These add a wonderful crunch and healthy fats. If you have nut allergies, sunflower seeds are a great substitute in this classic cheese ball recipe.)
- ¼ cup finely chopped green onions (Adds a fresh, zesty flavor. Chives also work well!)
- 2 tablespoons milk (Adds moisture and helps everything bind together.)
- 1 teaspoon garlic powder (For that classic savory flavor. You can also use fresh minced garlic if you prefer in this easy cheese ball)
- ½ teaspoon onion powder (Adds depth of flavor.)
- ¼ teaspoon black pepper (Adds a little kick!)
Here’s a classic cheese ball recipe nutrition hack that changed our family’s health: I sneak in a tablespoon of flaxseed meal! It adds a boost of omega-3s without changing the taste. You can find these wholesome ingredients at your regular grocery store. This classic cheese ball recipe proves nutritious doesn’t mean expensive, which is always a win in my book! Also be sure to check out another of our family favorites, our jalapeno popper cheese ball.
Mom Tip: To save time, I often prep the ingredients the night before. I chop the nuts and green onions and measure out the spices. That way, when I’m ready to make the classic cheese ball recipe, it comes together in minutes!
Let’s Make it Happen!
Okay, let’s get our hands dirty and make this delicious classic cheese ball recipe! Don’t worry if you’re not a seasoned chef – this is truly a no-fail recipe, perfect for even the busiest of moms.
- Combine the Ingredients: In a medium bowl, combine the softened cream cheese, cheddar cheese, pecans or walnuts, green onions, milk, garlic powder, onion powder, and black pepper.
- Mix Well: Use a mixer to blend everything together until smooth and well combined. Make sure there are no lumps of cream cheese! This step is crucial for the perfect classic cheese ball recipe consistency.
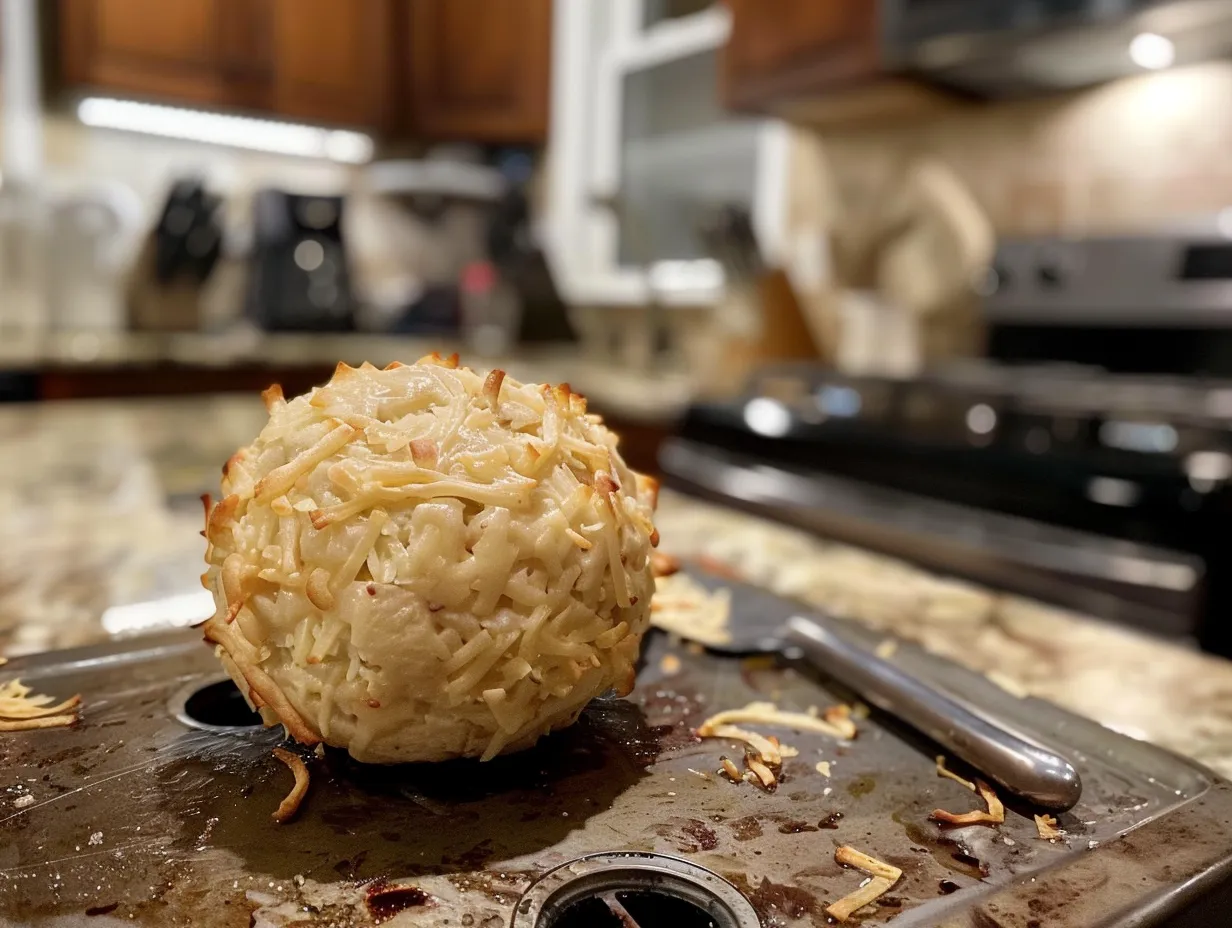
- Shape the Cheese Ball: Form the cheese mixture into a ball. I like to use my hands, but you can also use plastic wrap to help shape it.
- Wrap and Chill: Wrap the cheese ball tightly in plastic wrap and refrigerate for at least 2 hours, or even overnight. This allows the flavors to meld together and the cheese ball to firm up in this cheddar cheese ball. In my busy kitchen, this nutritious classic cheese ball recipe usually takes about 10-15 minutes to prep and then a few hours to chill. Perfect time to prep tomorrow’s lunch!
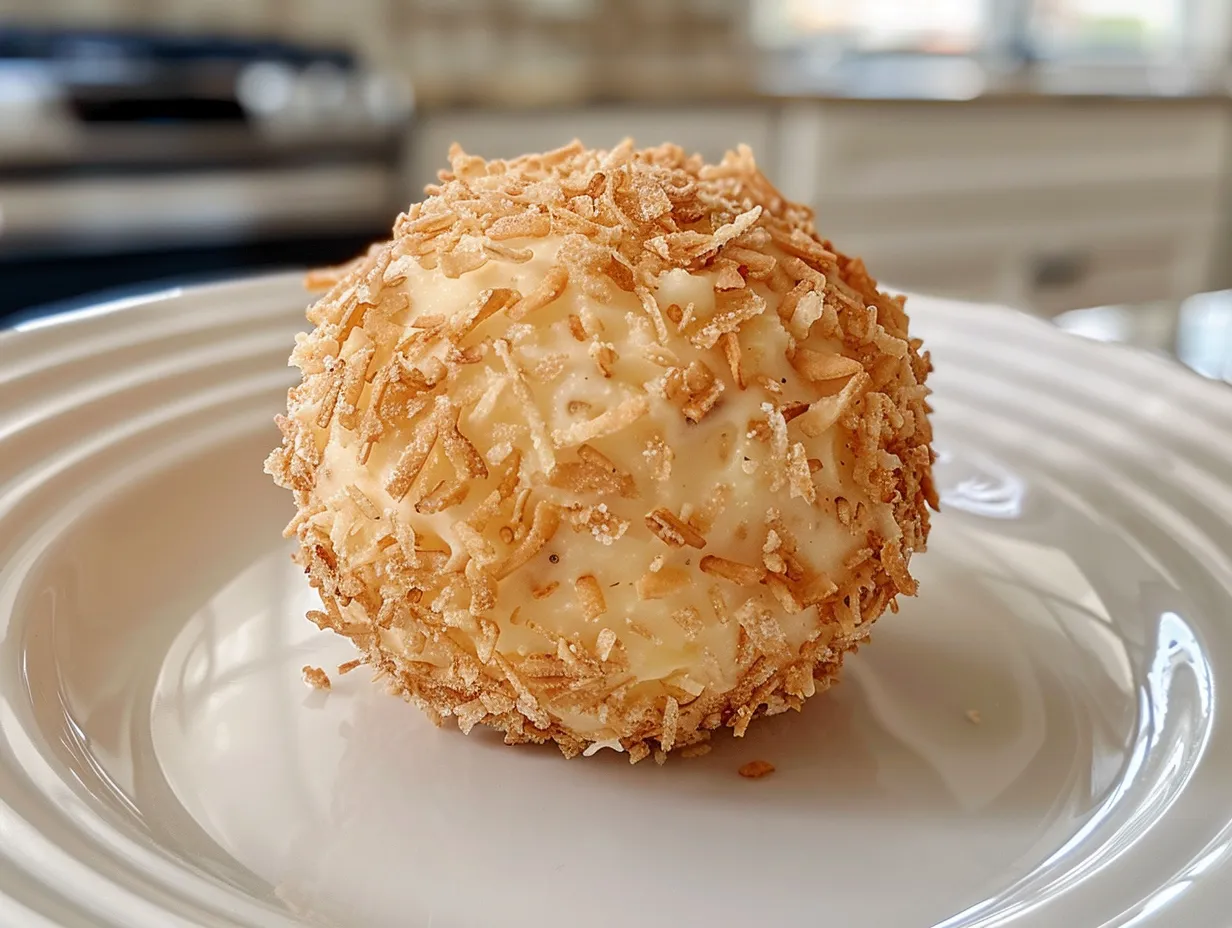
- Coat (Optional): Before serving, you can coat the cheese ball with additional chopped nuts, herbs, or even crushed crackers. This adds extra flavor and texture. I often use a mix of pecans and fresh parsley for a festive look to my holiday cheese ball.
- Serve and Enjoy: Serve the classic cheese ball recipe with your favorite crackers, vegetables, or bread.
Here’s where I used to struggle with my classic cheese ball recipe – I wouldn’t let it chill long enough! The longer it chills, the better it tastes and the easier it is to handle.
While your classic cheese ball recipe is chilling, take a moment to appreciate nourishing your family! And remember, if you’re looking for another quick and easy snack option, check out this cheese ball recipe!
One wellness lesson I’ve learned is that presentation matters. Even something as simple as a classic cheese ball recipe can be made more appealing with a little extra effort. Arrange it nicely on a platter with colorful veggies and crackers, and your family will be more likely to dig in! Your classic cheese ball recipe should look nourishing by now.
How We Love to Eat This!
The kids devour this nutritious classic cheese ball recipe when I serve it with whole-wheat crackers and sliced bell peppers. The crackers provide some fiber, and the bell peppers add a boost of vitamin C. It’s a win-win!
This classic cheese ball recipe is perfect for those busy weeknights when we need good nutrition fast! I often make it on Sunday evenings and then we can snack on it throughout the week.
I also love serving this classic cheese ball recipe at parties. It’s always a hit, and I feel good knowing that I’m offering a relatively healthy appetizer option. I’ve even had friends ask me for the recipe! The best thing about this cheese ball appetizer is how easy it is to make.
For presentation, I like to place the classic cheese ball recipe on a wooden board with a variety of colorful crackers, vegetables, and even some fruit. It makes it look extra appealing and inviting.
Leftovers (if there are any!) are great on sandwiches or salads. It adds a creamy, cheesy flavor that the whole family enjoys. It is important to use the left overs within a few days though.
For a seasonal variation, I sometimes add dried cranberries and orange zest to the classic cheese ball recipe during the holidays. It adds a festive touch and a burst of flavor that everyone loves.
FAQs: Your Questions Answered
Is this classic cheese ball recipe really nutritious enough for growing kids?
Absolutely! While it’s not a complete meal, this classic cheese ball recipe contains protein, healthy fats, and vitamins. Plus, when you serve it with nutritious dippers like veggies and whole-grain crackers, it becomes a well-rounded snack option.
What if my picky eater won’t try this healthy classic cheese ball recipe?
I get it! Picky eaters can be a challenge. Here’s my advice: start small. Offer a tiny taste of the classic cheese ball recipe on a cracker and don’t pressure them to eat more. You can also try letting them help you make it – kids are often more willing to try things they’ve helped create. Another tip: cut up a apple, the sweetness helps create a bridge to trying something new!
Can I meal prep this classic cheese ball recipe for busy weeks ahead?
Definitely! This classic cheese ball recipe is perfect for meal prepping. You can make it ahead of time and store it in the refrigerator for several days. Just make sure to wrap it tightly in plastic wrap to prevent it from drying out. This cream cheese ball is great to make the day before a party!
Can I freeze this classic cheese ball recipe?
While you can freeze it, the texture of the cream cheese may change slightly when thawed. It might become a little grainier. If you do freeze it, make sure to wrap it very tightly to prevent freezer burn.
What other coatings can I use for this classic cheese ball recipe?
The possibilities are endless! Some other delicious coating options include:
- Crushed pretzels
- Everything bagel seasoning
- Chopped bacon
- Dried cranberries
- Fresh herbs like dill or parsley
How can I make this classic cheese ball recipe dairy-free?
You can easily make this classic cheese ball recipe dairy-free by using plant-based cream cheese and shredded cheddar cheese. Just make sure to check the labels to ensure they are truly dairy-free.
Is this cheddar cheese ball gluten-free?
The cheese ball itself is gluten-free, but you’ll need to be mindful of what you serve it with. Choose gluten-free crackers or vegetables for dipping.
Final Thoughts:
This classic cheese ball recipe is more than just an appetizer; it’s a symbol of family, tradition, and simple nutrition. I hope you enjoy making it as much as my family and I do!
My classic cheese ball recipe Nutrition Hacks:
- Sneak in veggies: Finely chop some carrots or celery and mix them into the cheese mixture.
- Use whole-wheat crackers: Serve the classic cheese ball recipe with whole-wheat crackers for added fiber.
- Add protein: Mix in some cooked and crumbled bacon or ham for an extra boost of protein.
Here are a few family-tested healthy classic cheese ball recipe variations:
- Spicy: Add a pinch of cayenne pepper or some chopped jalapenos to the cheese mixture.
- Mediterranean: Mix in some chopped Kalamata olives, sun-dried tomatoes, and feta cheese.
- Sweet and Savory: Add some dried cranberries and a drizzle of honey to the cheese mixture.
My husband prefers the spicy version, while the kids love the sweet and savory option. I encourage you to make this classic cheese ball recipe your own and experiment with different flavors and ingredients. For another mom-approved recipe, check out this classic cheese ball recipe!
I truly hope this classic cheese ball recipe brings joy and nourishment to your family. Remember, simple nutrition is the key to success! Don’t be afraid to get creative and have fun in the kitchen. And if you’re looking for more simple nutrition ideas, be sure to check out my website at Busy Mom Simple Nutrition.
You got this, mama! Go make that holiday cheese ball!
classic cheese ball recipe
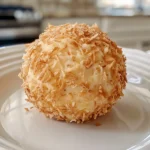
This classic cheese ball is the perfect party appetizer! Creamy, cheesy, and coated with crunchy nuts, it’s always a crowd-pleaser.
- Prep Time: 20 minutes
- Cook Time: 0 minutes
- Total Time: 2 hours 20 minutes
- Yield: 12 servings
- Category: Appetizer
- Method: No-Cook
- Cuisine: American
Ingredients
- 8 ounces cream cheese, softened
- 8 ounces cheddar cheese, shredded
- 4 ounces blue cheese, crumbled
- 1/4 cup mayonnaise
- 2 tablespoons Worcestershire sauce
- 1 clove garlic, minced
- 1/4 teaspoon onion powder
- 1/2 cup chopped pecans or walnuts
Instructions
- In a large bowl, beat together the cream cheese, cheddar cheese, and blue cheese until smooth.
- Stir in the mayonnaise, Worcestershire sauce, garlic, and onion powder.
- Cover and refrigerate for at least 2 hours or overnight to allow the flavors to meld.
- Place the chopped nuts on a plate.
- Shape the cheese mixture into a ball and roll it in the nuts, coating it evenly.
- Wrap the cheese ball in plastic wrap and refrigerate for at least 30 minutes before serving.
- Serve with crackers, vegetables, or bread.
Notes
For a festive touch, try coating the cheese ball in chopped fresh herbs like parsley, dill, or chives instead of nuts.