

It’s that time of year again, fellow nutrition-seekers! The holidays are here, and that means one thing in my kitchen: cookies! But this year, we’re not just making any cookies. We’re diving into a batch of Christmas Lights Cookies that are as fun to decorate as they are to eat. Yes, even I get a little overwhelmed with holiday baking, but I promise you, these are designed for sanity-saving nutrition without the fuss.
I remember the first time I attempted Christmas Lights Cookies. My oldest was about 4, and he was OBSESSED with Christmas lights. We drove around every night just to see them. I thought, “Why not bring the lights inside…in cookie form?” Turns out, it was a messy, but delicious, way to spend an afternoon. These Christmas Lights Cookies quickly became a family tradition.
Let’s be honest, sometimes it feels like we’re choosing between fun and nutrition. But these Christmas Lights Cookies are a win-win! The kids get to decorate, and I get to sneak in a few healthier ingredients. Because good nutrition shouldn’t mean missing out on the joy of the season, right?
I’m sharing this recipe because, as busy moms, we need all the help we can get to keep our families happy and healthy. So grab your aprons, and let’s get baking these festive and nutritious Christmas Lights Cookies!
INGREDIENTS You’ll Need:
Here’s what you need for these fun, festive, and nutritious Christmas Lights Cookies. Trust me, this ingredient list is simple because busy moms need nutrition without complexity!
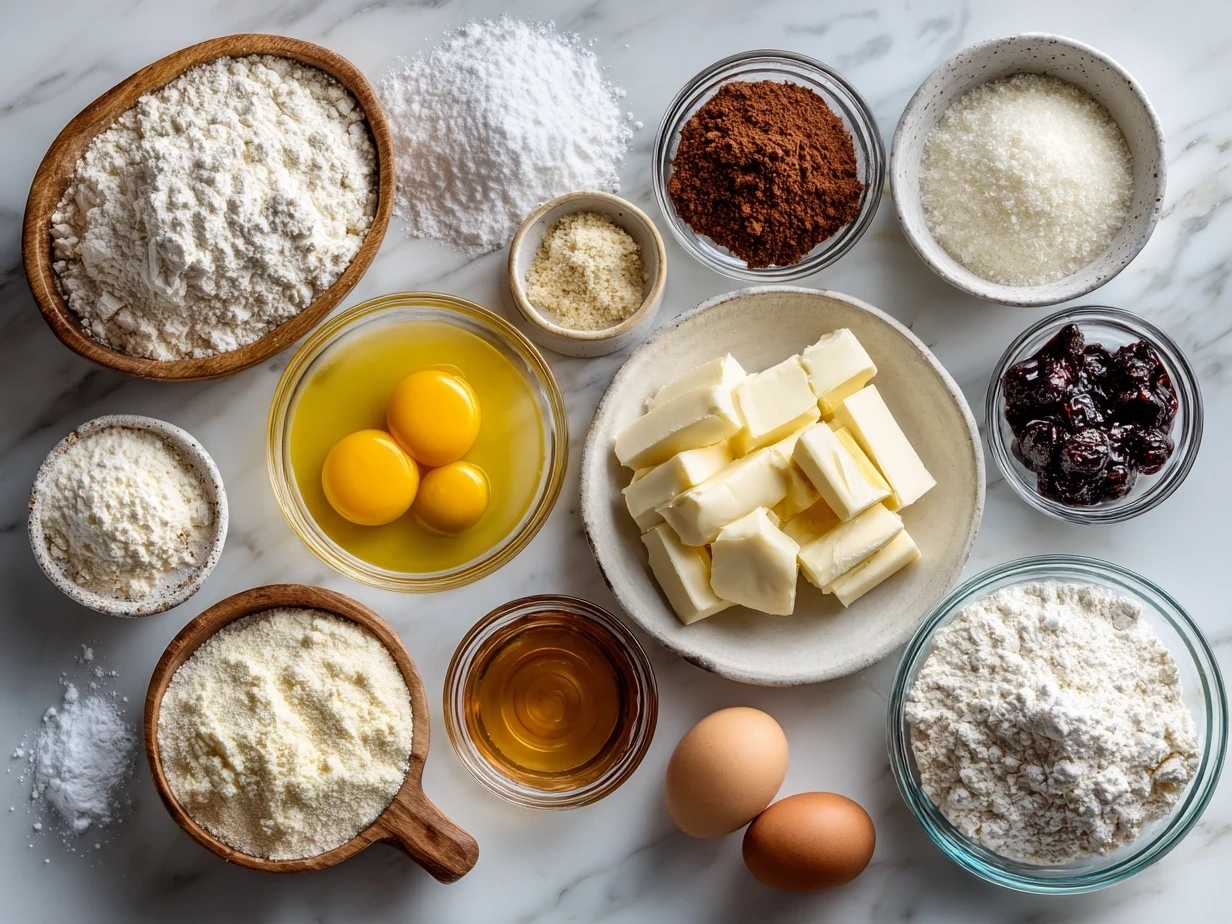
- 3 cups all-purpose flour: The base of our cookies. I sometimes swap in 1 cup of whole wheat flour for extra fiber!
- 1 cup (2 sticks) unsalted butter, softened: Adds richness and flavor.
- 1 cup granulated sugar: For sweetness, of course! I’ve experimented with using half coconut sugar for a lower glycemic index.
- 1 large egg: Binds everything together. I always opt for free-range eggs for extra nutrients.
- 1 teaspoon vanilla extract: Adds a touch of warmth.
- 1/2 teaspoon baking powder: Helps the cookies rise slightly.
- 1/4 teaspoon salt: Balances the sweetness.
- Royal icing: For decorating.
- Mini M&M’s or other small candies: To make the “lights.”
You can find these wholesome ingredients at your regular grocery store. I always stock up on baking essentials during my weekly shopping trip. This Christmas Lights Cookies proves nutritious doesn’t mean expensive, which is a huge plus for our family budget.
Let’s Make it Happen!
Alright, let’s get down to business! Follow these easy steps to create these delightful Christmas Lights Cookies with your family. Don’t worry if things get a little messy – that’s part of the fun!
- Preheat your oven to 375°F (190°C). Line baking sheets with parchment paper. This makes cleanup a breeze, which is always a win in my book!
- In a large bowl, cream together the softened butter and sugar until light and fluffy. I use an electric mixer, but you can also do this by hand if you’re feeling ambitious. This step is crucial for getting the right texture for your Christmas Lights Cookies.
- Beat in the egg and vanilla extract. Make sure everything is well combined. In my busy kitchen, this nutritious Christmas Lights Cookies usually takes me about 15 minutes to prep before baking.
- In a separate bowl, whisk together the flour, baking powder, and salt. This ensures the baking powder is evenly distributed.
- Gradually add the dry ingredients to the wet ingredients, mixing until just combined. Be careful not to overmix, or your cookies will be tough. This is where I used to struggle with my Christmas Lights Cookies – learn from my experience!
- Roll out the dough on a lightly floured surface to about 1/4 inch thickness. Use a cookie cutter to cut out your desired shapes. I like to use star and circle cutters for Christmas Lights Cookies.
- Place the cookies onto the prepared baking sheets. Leave a little space between each cookie.
- Bake for 8-10 minutes, or until the edges are lightly golden. Keep a close eye on them! Your Christmas Lights Cookies should smell nourishing by now.
- Let the cookies cool on the baking sheets for a few minutes before transferring them to a wire rack to cool completely. Perfect time to prep tomorrow’s lunch!
- Once the cookies are completely cool, it’s time to decorate! Frost the cookies with royal icing and add mini M&M’s or other small candies to resemble Christmas lights.
While your Christmas Lights Cookies are cooking, take a moment to appreciate nourishing your family! It’s these little moments that make all the difference. Head to Christmas Lights Cookies with Royal Icing | Dessert for Two for more decorating ideas!
How We Love to Eat This!
Now for the best part – enjoying these delightful Christmas Lights Cookies! Here’s how we make the most of them in our house.
The kids devour this nutritious Christmas Lights Cookies when I serve it with a glass of milk. I sometimes add a side of fruit for extra vitamins! These Christmas Lights Cookies are perfect for those busy weeknights when we need good nutrition fast!
We also love bringing these Christmas Lights Cookies to holiday parties. They’re always a hit with both kids and adults. Presentation matters! I arrange them on a festive platter to make them even more appealing. This Christmas Lights Cookies recipe is so easy and fun that I get the kids involved in every step, from mixing the dough to arranging the “lights.”
FAQs: Your Questions Answered
Here are some common questions I get from fellow moms about these Christmas Lights Cookies. I hope these answers help you feel confident in making them for your family!
Final Thoughts:
I truly hope you and your family enjoy these festive and nutritious Christmas Lights Cookies as much as we do! They’re more than just a treat; they’re a way to create lasting memories and share the joy of the season. For more simple nutrition ideas for busy families, check out Christmas sugar cookies.

- Whole Wheat Flour: Substitute up to half of the all-purpose flour with whole wheat flour for added fiber.
- Reduced Sugar: Cut back on the sugar by 1/4 cup without sacrificing too much sweetness.
- Flaxseed Boost: Add a tablespoon of ground flaxseed for extra omega-3s and fiber.
- Orange Zest: Add the zest of one orange to the dough for a citrusy twist. My son loves this version!
- Gingerbread Spice: Mix in a teaspoon of gingerbread spice for a warm, cozy flavor. My daughter prefers this one.
- Chocolate Chips: Fold in 1/2 cup of mini chocolate chips for a chocolatey treat. This is my husband’s favorite.
\n \n Print
Christmas Lights Cookies

These festive Christmas Lights Cookies are a fun and delicious way to celebrate the holidays! Soft sugar cookies are decorated with colorful icing and candy ‘lights’ for a treat everyone will love.
- Prep Time: 30 minutes
- Cook Time: 10 minutes
- Total Time: 40 minutes
- Yield: 24 cookies
- Category: Dessert
- Method: Baked
- Cuisine: American
Ingredients
- 1 cup (2 sticks) unsalted butter, softened
- 1 1/2 cups granulated sugar
- 2 large eggs
- 1 teaspoon vanilla extract
- 3 cups all-purpose flour
- 1 teaspoon baking powder
- 1/2 teaspoon salt
- Royal Icing (recipe follows)
- Mini M&M’s or other small colorful candies
Instructions
- Preheat oven to 375°F (190°C).
- In a large bowl, cream together the butter and sugar until light and fluffy.
- Beat in the eggs one at a time, then stir in the vanilla.
- In a separate bowl, whisk together the flour, baking powder, and salt.
- Gradually add the dry ingredients to the wet ingredients, mixing until just combined.
- Roll out the dough on a lightly floured surface to 1/4-inch thickness.
- Cut out cookies using desired shapes (circles, squares, etc.).
- Place cookies on ungreased baking sheets.
- Bake for 8-10 minutes, or until edges are lightly golden.
- Let cool on baking sheets for a few minutes before transferring to a wire rack to cool completely.
- Decorate with royal icing and mini M&M’s to resemble Christmas lights.
Notes
For best results, use gel food coloring in your royal icing for vibrant colors. Let the icing harden completely before storing the cookies in an airtight container.