I still remember the very first time I made Baked Salmon Sushi Cups in my busy kitchen. Honestly, I stumbled upon this recipe scrambling to find something healthy, quick, and kid-pleasing for dinner after a long day of school runs and errands. My kids had been tired of the usual sandwiches, and I wanted to sneak in Omega-3 rich salmon without the stress of prepping fancy sushi rolls. When I shared these Baked Salmon Sushi Cups at the dinner table, the surprise on their faces spoke volumes—it was a hit! This simple twist on salmon sushi appetizers gave us a fresh way to enjoy nutritious fish without the overwhelm of complicated techniques.
What made this Baked Salmon Sushi Cups recipe a true nutrition win was how it balanced wholesome ingredients with flavors my whole family enjoyed. Salmon, packed with heart-healthy fats, combined with rice and a hint of creamy goodness from cream cheese brought not only flavor but genuine nourishment to our dinner plate. As a fellow busy mom, I found this recipe to be a gentle reminder that feeding your family well doesn’t mean hours in the kitchen or confusing ingredients. It became my go-to for both easy weeknight meals and snack time nutrition hacks.
If you’re juggling daycare pickups, errands, and trying to squeeze in something nourishing, this Baked Salmon Sushi Cups recipe could be just the solution you’ve been searching for. Whether you’re new to cooking salmon sushi appetizers or looking for a simple, family-approved sushi cup recipe, this one is worth trying. I’m so excited to share the details with you today, and I hope it brings a little peace and lots of good nutrition to your mealtime chaos too!
Speaking of simple nutrition ideas, if your family enjoys these baked salmon recipes, you might also love this rice sushi with smoked salmon and avocado recipe I recently tried—another hit in our house. And for breakfast inspiration, don’t miss my favorite easy baked oats recipe for a quick morning boost. Let’s dive into how to get this nourishing Baked Salmon Sushi Cups on your table soon!
Ingredients You’ll Need:
Here’s what makes the magic happen for these Baked Salmon Sushi Cups. Trust me, the ingredient list is simple enough for busy moms who want nutrition without complexity!
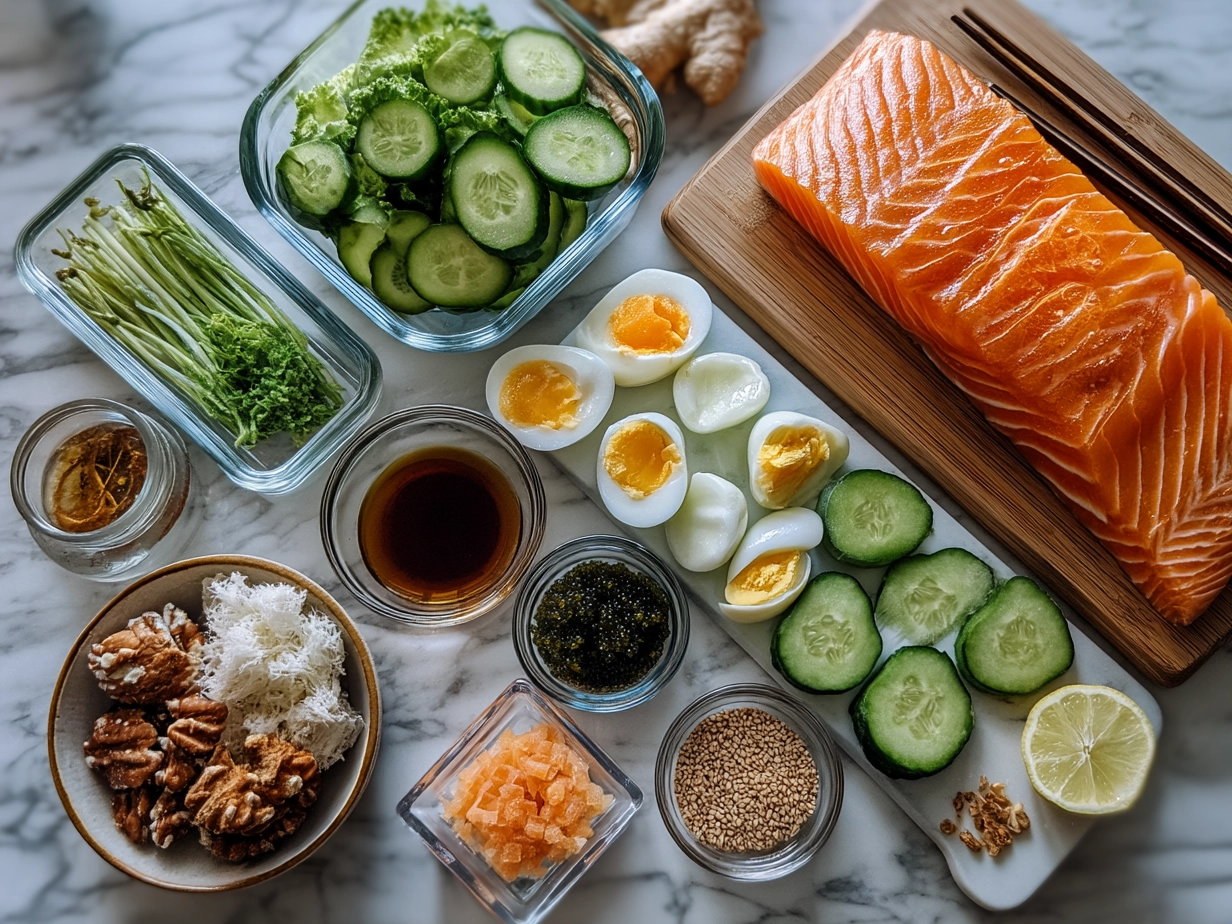
- 1 cup sushi rice (rinse and cook as package directs)
- 8 oz fresh salmon fillet (skin removed for smooth bites)
- 1/4 cup cream cheese, softened (for those salmon sushi cups with cream cheese that add creamy richness)
- 1 tablespoon soy sauce or tamari (gluten-free option)
- 1 teaspoon sesame oil (a little flavor boost)
- 1 tablespoon rice vinegar (adds that subtle sushi tang)
- 1/2 avocado, sliced (optional, but my family loves the healthy fats it adds)
- 1 teaspoon toasted sesame seeds (for garnish)
- Nori sheets or seaweed snacks (cut into strips or small squares)
- Finely chopped green onions (for a fresh crunch topping)
No worries if you don’t happen to have rice vinegar on hand—I sometimes swap in a squeeze of fresh lemon juice for a bright kick. For a budget-friendly salmon option, frozen wild-caught salmon works just as well and still gives you those brain-boosting omega-3s for your little ones. This Baked Salmon Sushi Cups recipe proves that nutritious doesn’t mean expensive or complicated.
You can find all these wholesome ingredients at your regular grocery store. When life gets hectic, I like to prep my rice in bulk ahead of time—this Baked Salmon Sushi Cups recipe comes together even faster that way. And for an extra nutrition hack, my family gets boosted with a sprinkle of flax seeds mixed into the rice before baking—it’s subtle but packs a punch of healthy omega fats.
If you’re intrigued by salmon sushi appetizers but want a simple starting point, this Baked Salmon Sushi Cups ingredient list is a great place to begin!
Let’s Make it Happen!
1. Preheat your oven to 375°F. This sets the stage for our nutritious Baked Salmon Sushi Cups adventure. While the oven warms, you can prep other ingredients.
2. Cook the sushi rice according to package instructions. Remember, for perfect sushi rice texture, rinse it well before cooking to remove excess starch. In busy kitchens, I often double the batch so I have rice ready for other family meals, like this rice sushi with smoked salmon and avocado.
3. Prepare the salmon. Lightly season your fillet with a tiny drizzle of soy sauce. Place on a baking sheet lined with parchment. Bake for about 12-15 minutes, or until cooked through and flaky. Your kitchen will begin to smell nourishing—the perfect cue that your Baked Salmon Sushi Cups are on their way!
4. Let the salmon cool slightly, then flake it with a fork. This makes it easier to spoon into each sushi cup later. Don’t worry if the salmon isn’t perfectly uniform—this recipe thrives on homemade charm!
5. Mix together the cooked rice, cream cheese, rice vinegar, sesame oil, and soy sauce in a bowl. This creates the creamy rice base for your Baked Salmon Sushi Cups. I found it helpful to gently fold rather than stir vigorously so the rice stays fluffy.
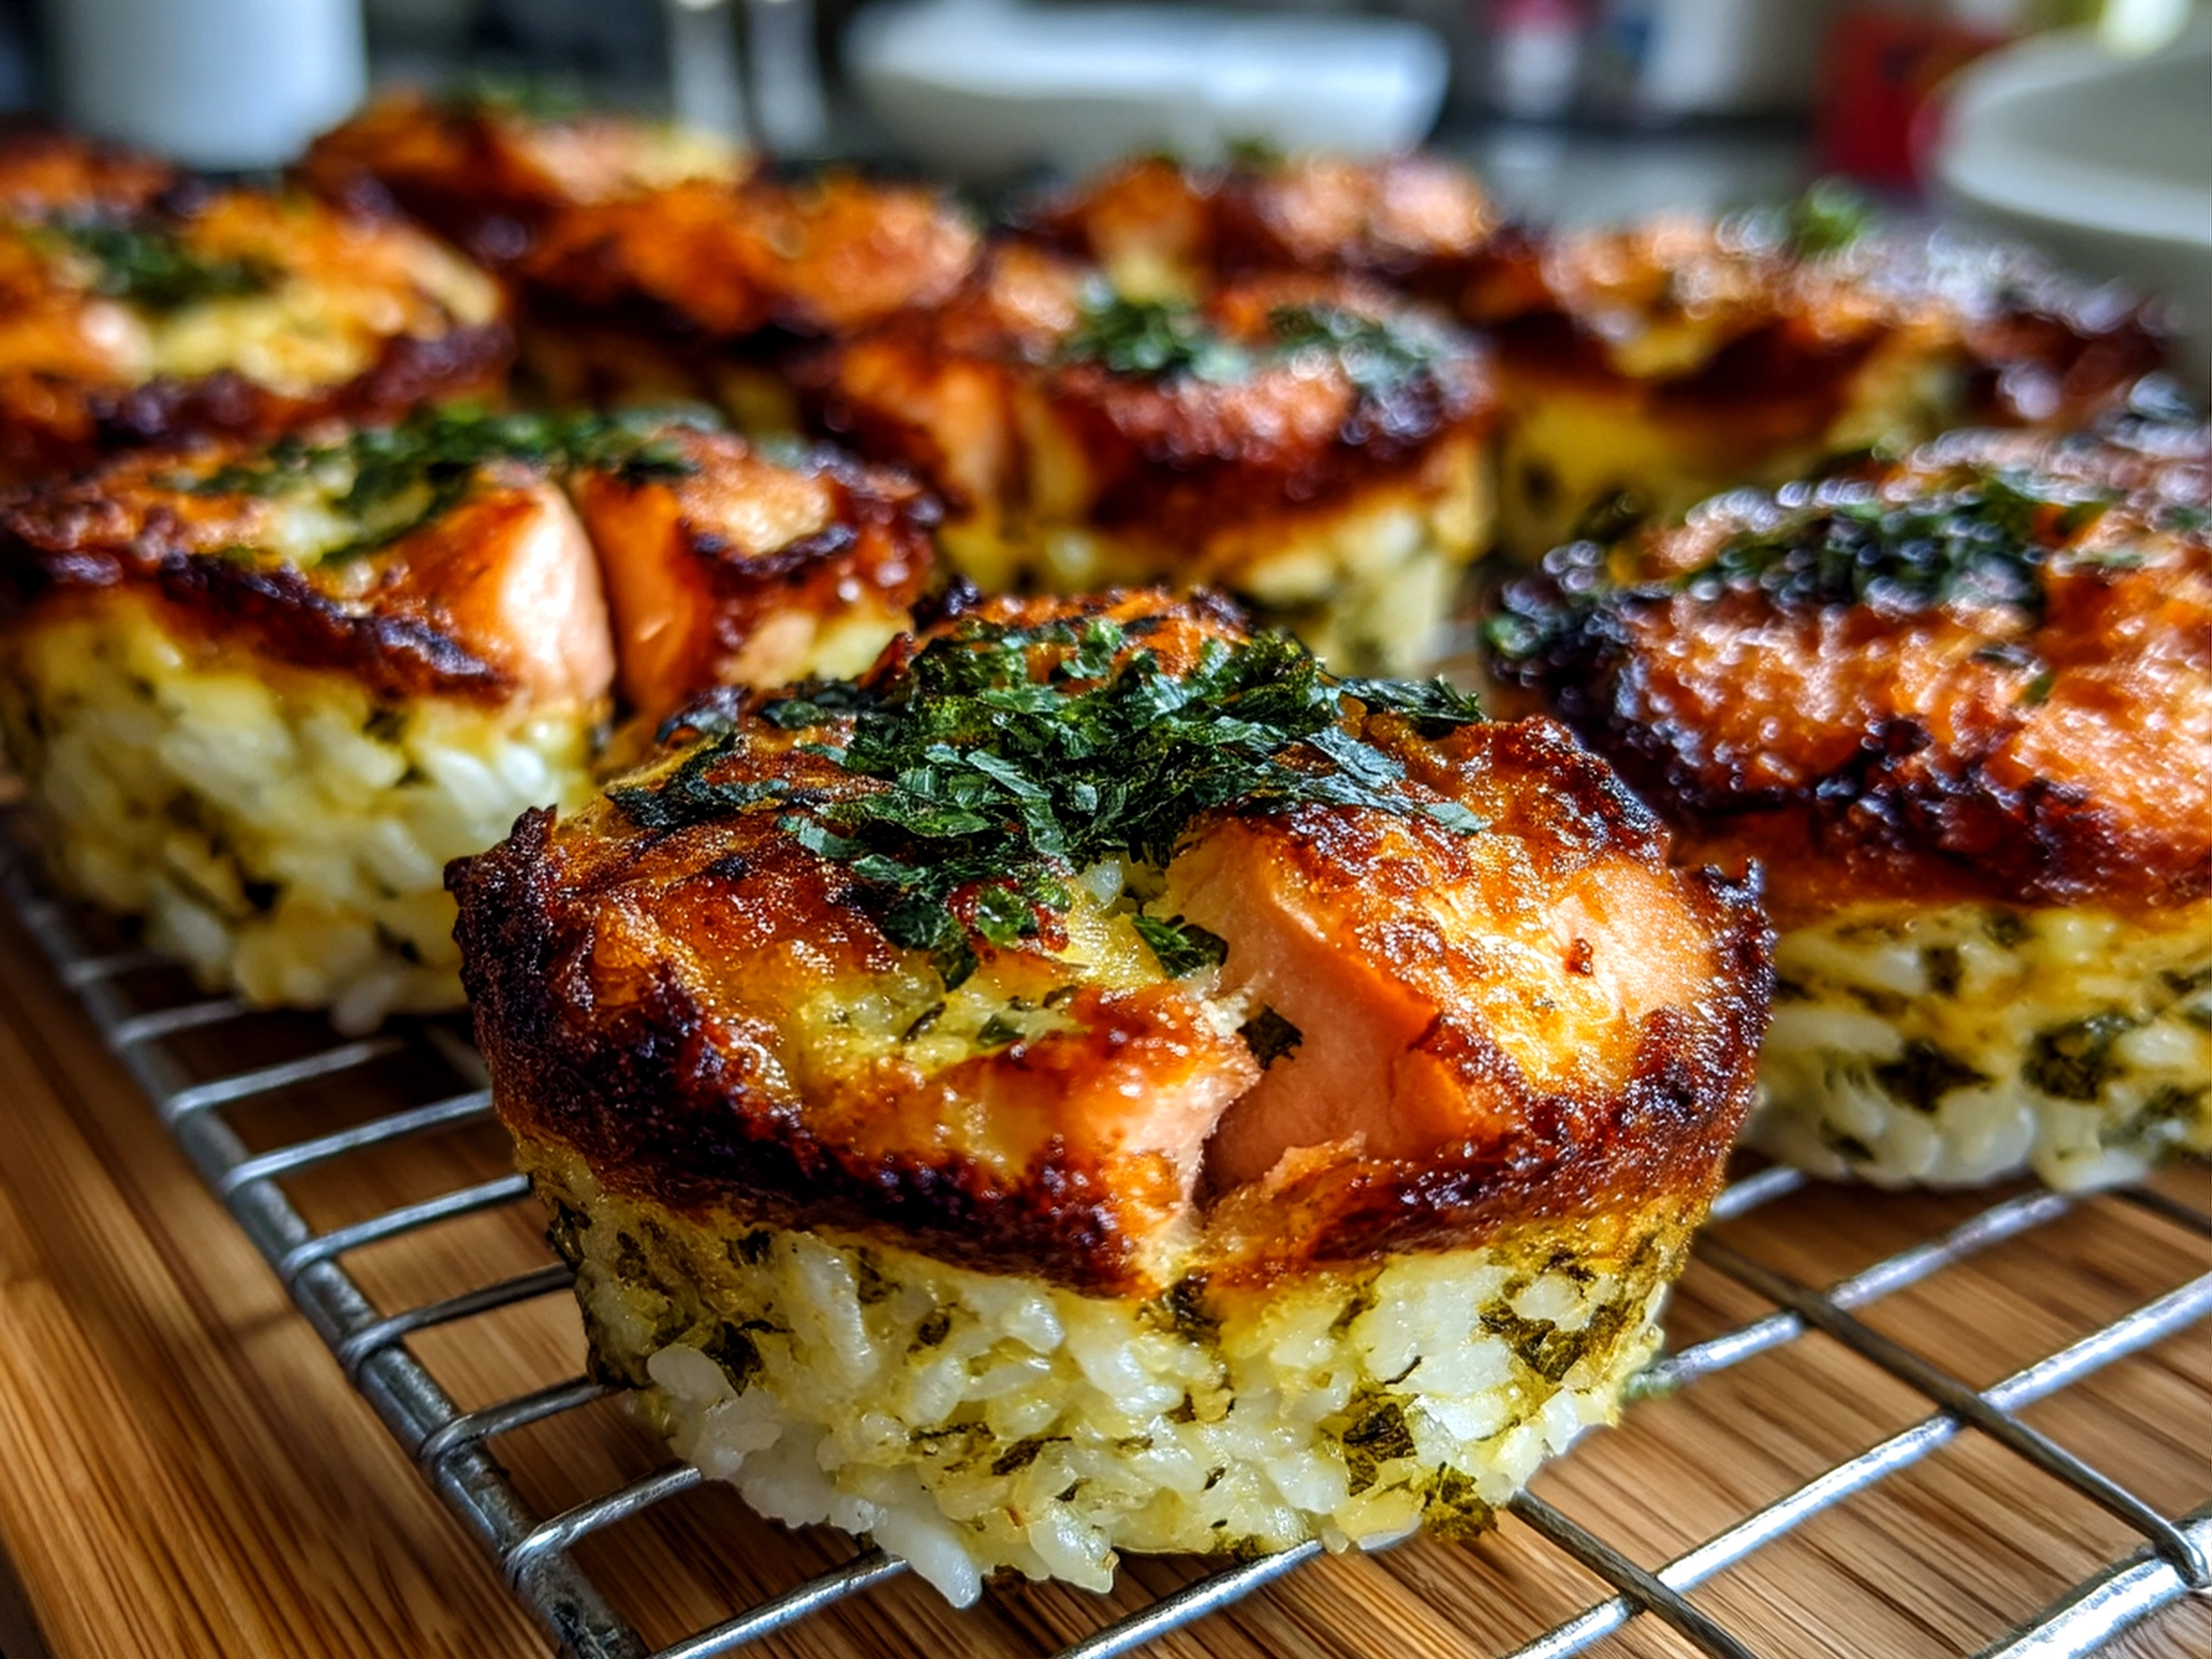
6. Line a cupcake tin with small squares of nori or seaweed snacks. This forms the edible cup shape. If you’re new to this sushi cup recipe, don’t stress about perfect edges—my first attempts looked quirky but tasted amazing!
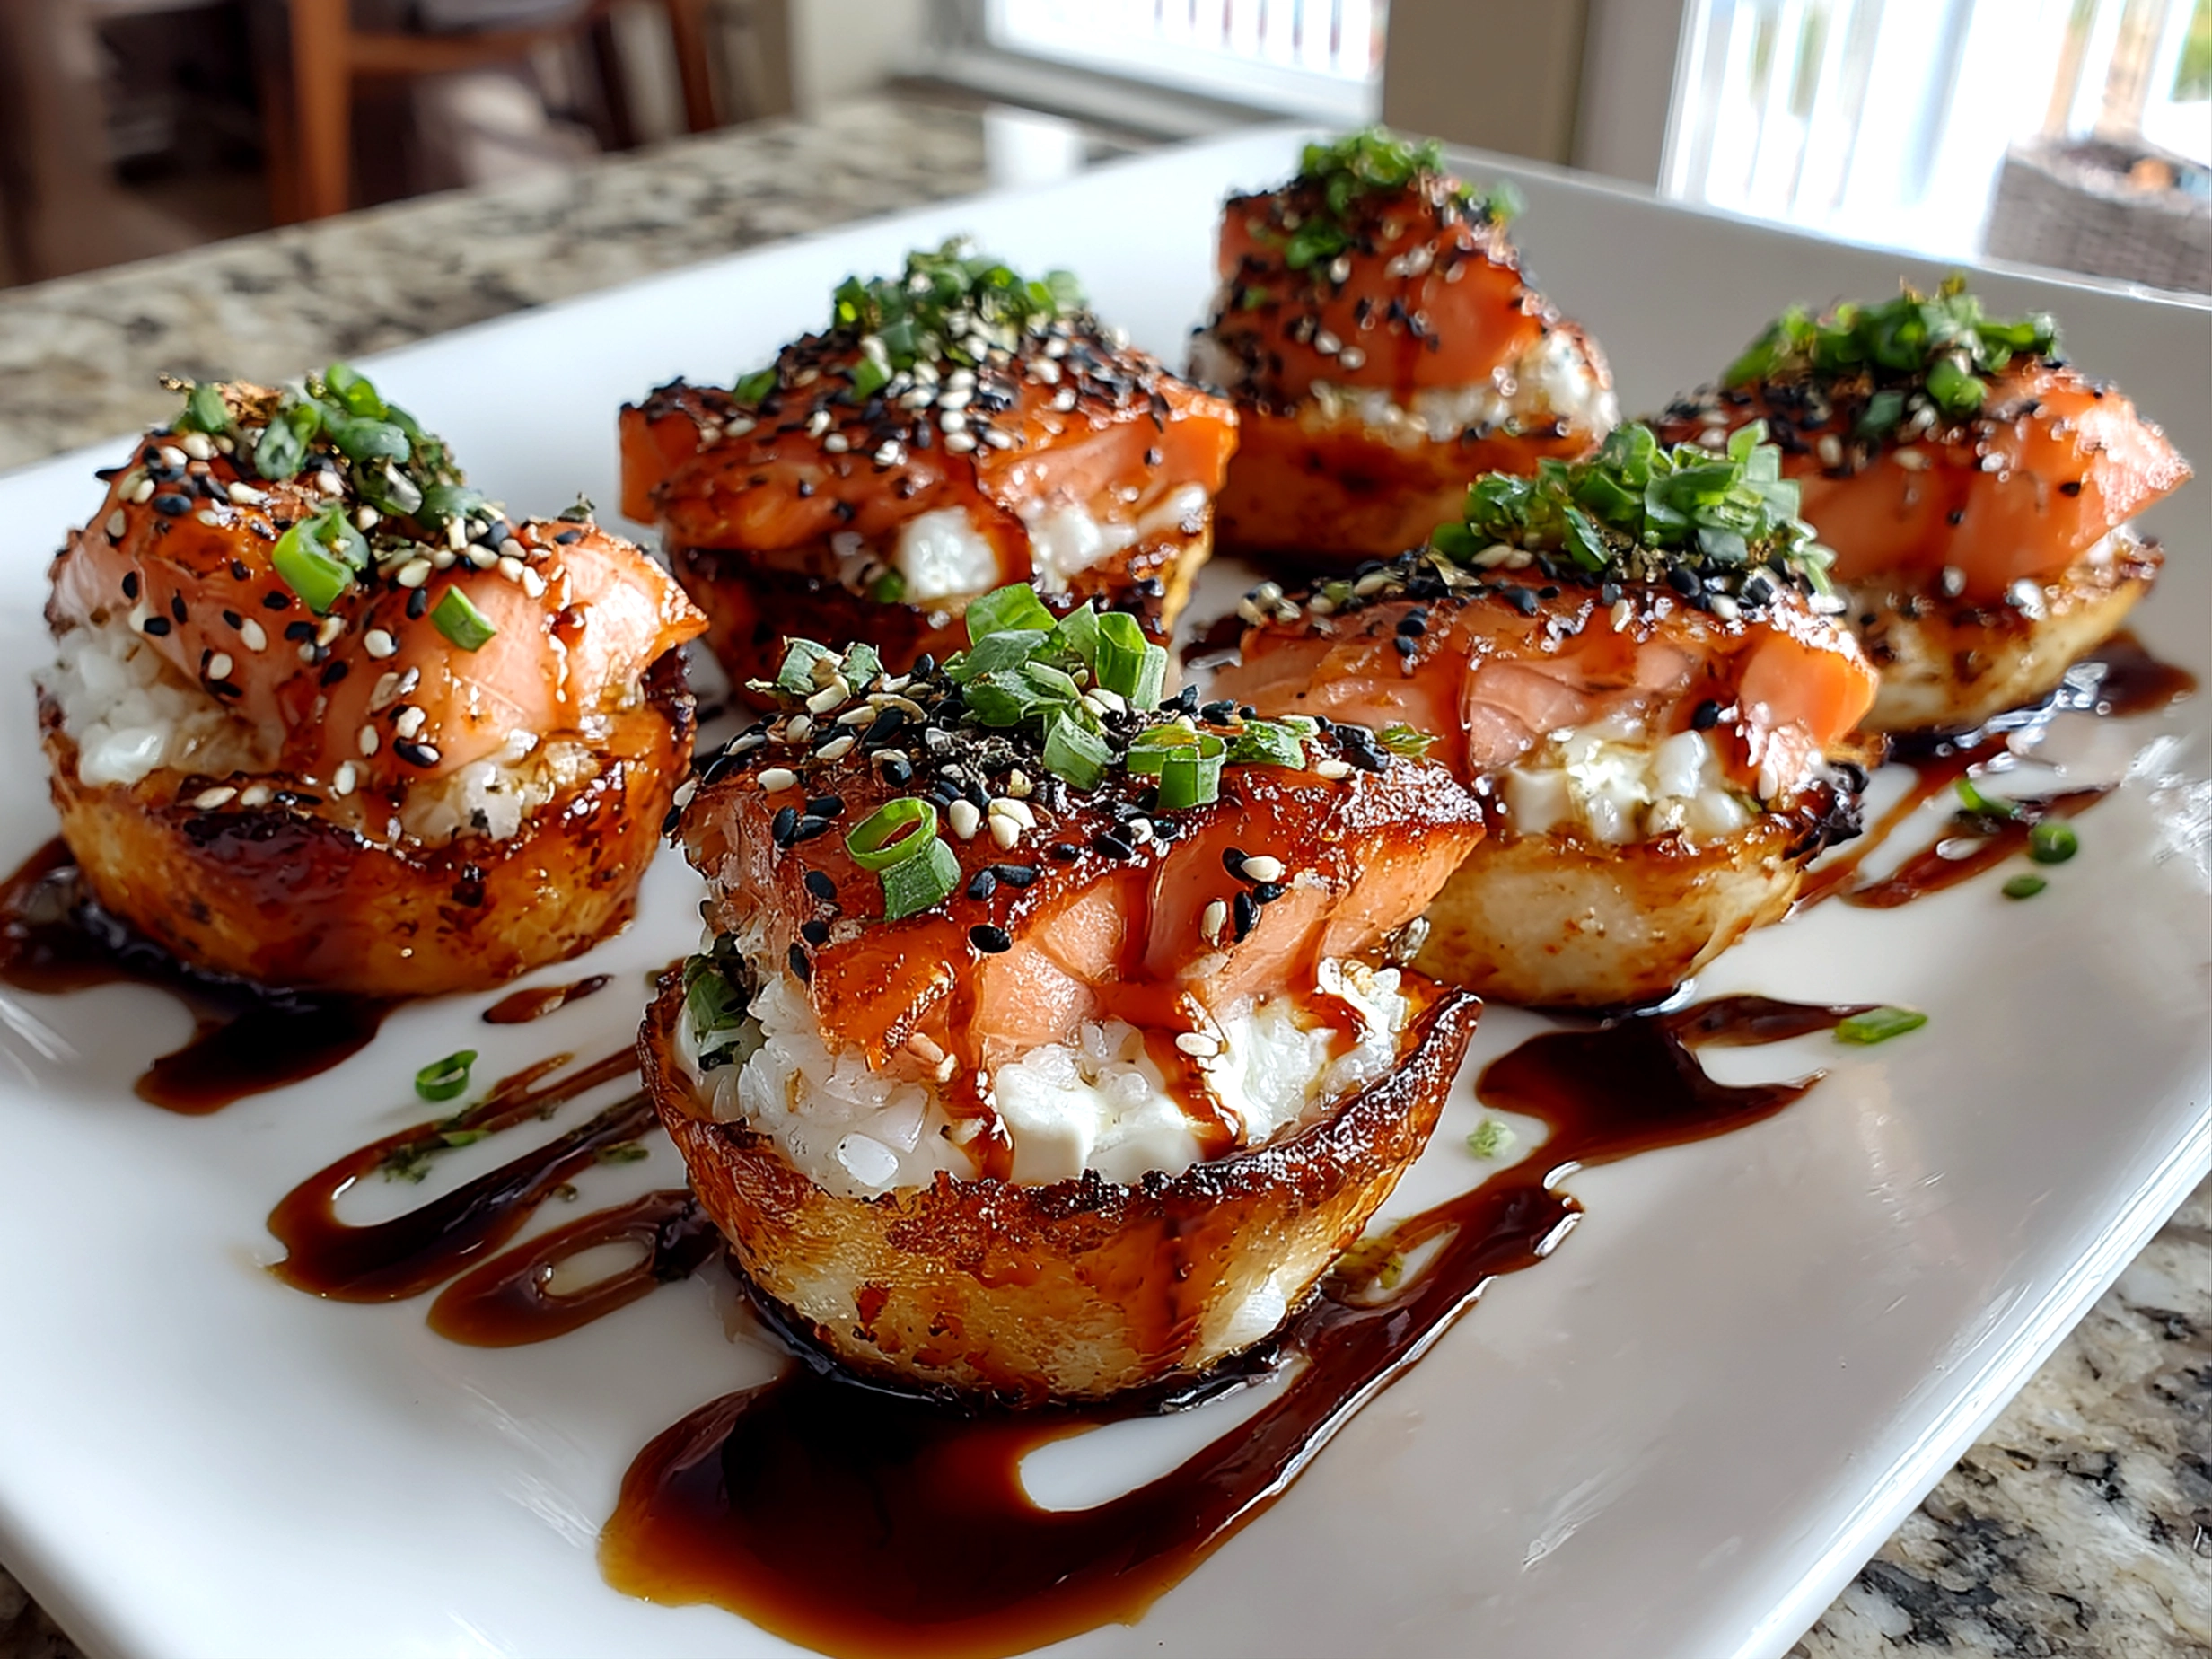
7. Press a spoonful of the rice mixture into each nori cup. Then add a layer of flaked salmon on top. For an extra nutrition boost, add a small slice of avocado inside each cup before topping with salmon.
8. Sprinkle sesame seeds and chopped green onions over your Baked Salmon Sushi Cups to finish. These little touches add flavor and eye appeal, especially helpful for getting kids excited about dinner.
9. Bake your assembled Salmon Sushi Cups for another 7-10 minutes to warm through and slightly melt the cream cheese. This step is a little trick that changed everything for me—the warm, baked flavors won over even the pickiest eaters.
10. Serve warm, and enjoy! While your Baked Salmon Sushi Cups cook, you’ve got the perfect moment to squeeze in prepping tomorrow’s lunch or a quick kitchen tidy-up.
This Baked Salmon Sushi Cups recipe usually takes about 40 minutes total in my busy kitchen from start to finish, making it a solid choice for weeknights when I want nourishing chaos but without the stress!
How We Love to Eat This!
My kids devour these nutritious Baked Salmon Sushi Cups when I serve them up with crunchy steamed edamame and a side of mild miso soup for added protein and gut-healthy benefits. The combination feels balanced without overwhelming young taste buds.
For quick weekday dinners, this sushi cup recipe shines because it feels special but comes together fast. Bonus—it’s one of those salmon sushi appetizers that guests always ask about when they stop by. I like to garnish with extra avocado slices or a drizzle of sriracha mayo for a little grown-up twist!
Leftovers? Absolutely! These Baked Salmon Sushi Cups reheat nicely in the oven or even enjoy cold as easy sushi bites for lunchboxes or after-school snacks. I personally love to add a fresh cucumber salad on the side for a light crunch.
Seasonally, we sometimes swap the avocado for thin apple slices in autumn for a sweet and savory bite or add chopped bell peppers for a sprinkle of color and vitamin C. No matter the variation, this Baked Salmon Sushi Cups keeps nutrition front and center while satisfying our family’s taste buds.
This family-healthy sushi cup recipe reminds me of another favorite: rice sushi with smoked salmon and avocado, which also brings easy nutrition to the table. If you love simple baked salmon recipes like this one, you might also enjoy the cozy, kid-friendly baked mac and cheese recipe I keep in my weeknight rotation.
FAQs: Your Questions Answered
Is this Baked Salmon Sushi Cups really nutritious enough for growing kids?
Absolutely! Salmon offers essential omega-3 fatty acids that support brain development and heart health. Pairing it with sushi rice and cream cheese adds energy and calcium, perfect for growing bodies.
What if my picky eater won’t try this healthy Baked Salmon Sushi Cups?
I get it. Try customizing toppings—sometimes letting kids add their own avocado or a tiny drizzle of soy sauce makes it more fun. Also, baking the sushi cups slightly melts the cream cheese and softens salmon, making the texture more appealing.
Can I meal prep this Baked Salmon Sushi Cups for busy weeks ahead?
Yes! You can assemble the sushi cups, store them covered in the fridge, and bake fresh when you’re ready. Or make the baked salmon recipes in bulk and store flaked salmon separately for quick assembly later.
What can I substitute for cream cheese if I’m avoiding dairy?
Try a dairy-free cream cheese or mashed avocado for creaminess in your Baked Salmon Sushi Cups. Both give that luscious texture without the dairy.
Are there ways to make this a gluten-free recipe?
Definitely—just use tamari instead of soy sauce, and check your rice for gluten-free certification, and your sushi cup recipe stays safe for gluten sensitivities.
Do I need special equipment for Baked Salmon Sushi Cups?
You just need a cupcake tin and basic kitchen gear. It’s perfect for busy moms who want nutritious meals without fancy gadgets.
Can this recipe be kid-friendly spicy?
Yes! I like adding a little mild sriracha mayo on top for adult versions, but for kids, keep it simple or swap spicy mayo for mashed avocado to stay gentle.
For more simple nutrition ideas that fit our busy mom lives, check out this easy baked oats recipe for breakfast and a cozy baked mac and cheese recipe for dinner. Also, if your family loves baked salmon recipes, here’s a great viral TikTok Baked Salmon Sushi Cups recipe I’ve tried, and my friends love the Lovely Delites version of Baked Salmon Sushi Cups for a lighter twist. Another inspiration comes from the flavorful Baked Chipotle Salmon Sushi Cups recipe perfect for family dinners.
Final Thoughts:
This Baked Salmon Sushi Cups recipe has become a cornerstone of my family’s nutrition routine. It supports our goals for heart-healthy fats, balanced energy, and kid-friendly flavor all in one approachable dish. Plus, the way it simplifies preparing salmon sushi appetizers into easy baked sushi cups fits our busy schedules perfectly.
My Baked Salmon Sushi Cups Nutrition Hacks include:
- Adding flax seeds to the rice for extra omega-3 goodness
- Swapping cream cheese with mashed avocado on busy days to sneak more veggies in
- Doubling the batch to freeze extras for quick meals on hectic evenings
Over time, we’ve embraced different family-tested versions—my husband loves a spicy spread on his, while the kids prefer the classic salmon sushi cups with cream cheese untouched. My toddler loves it with extra avocado slices, turning this nutritious bite into a playful snack.
I encourage you to make this Baked Salmon Sushi Cups recipe your own. It’s designed for real families with real schedules trying to find simple, nourishing solutions amid the daily chaos. I hope it brings you lots of those sweet dinnertime nutrition wins and moments of joy with your loved ones.
If you want more, remember this wholesome recipe connects nicely with that easy baked oats recipe and the always comforting baked mac and cheese recipe I share too. Keep nourishing your family simply, without stress. You’ve got this!
For more inspiration, don’t miss the creative spins on Baked Salmon Sushi Cups shared by folks over at Kalejunkie, Lovely Delites, and Half Baked Harvest—their takes can spark new simple nutrition ideas that fit your family’s taste.
Happy cooking, fellow nutrition-seeker!
Baked Salmon Sushi Cups

Baked Salmon Sushi Cups combine tender baked salmon with seasoned sushi rice and fresh vegetables in crunchy seaweed cups, creating a delightful, healthy appetizer or snack.
- Prep Time: 20 minutes
- Cook Time: 20 minutes
- Total Time: 40 minutes
- Yield: 9 servings
- Category: Appetizer
- Method: Baked
- Cuisine: Japanese
Ingredients
- 1 cup sushi rice
- 1 1/4 cups water
- 2 tablespoons rice vinegar
- 1 tablespoon sugar
- 1/2 teaspoon salt
- 8 ounces fresh salmon fillet, skin removed
- 1 tablespoon soy sauce
- 1 teaspoon sesame oil
- 1 sheet nori (seaweed), cut into 9 squares
- 1/2 cucumber, finely diced
- 1 avocado, diced
- 2 green onions, thinly sliced
- 1 tablespoon sesame seeds
- Pickled ginger and wasabi for serving (optional)
Instructions
- Preheat oven to 375°F (190°C). Line a baking sheet with parchment paper.
- Cook sushi rice by rinsing under cold water until water runs clear. Combine rice and water in a pot, bring to boil, then reduce heat to low and simmer covered for 18 minutes. Remove from heat, let steam 10 minutes.
- Mix rice vinegar, sugar, and salt until dissolved and fold gently into cooked rice. Allow to cool.
- Place salmon on prepared baking sheet, brush with soy sauce and sesame oil. Bake for 12-15 minutes until cooked through. Let cool and flake into small pieces.
- Lightly toast nori squares in a dry skillet for 10 seconds on each side to make them crisp. Gently press each nori square into the cups of a mini muffin tin to form little cups.
- Fill each seaweed cup with a spoonful of sushi rice, then top with flaked salmon, diced cucumber, avocado, and green onions.
- Sprinkle sesame seeds over each cup and serve with pickled ginger and wasabi if desired.
Notes
For extra flavor, drizzle a little spicy mayo or eel sauce on top before serving.